LED Ring – Part 2

LED Ring V1In the first post of this series I write how we improved our 3D-Printer to print lager and more complex models. I also mentioned that i want a powerful and cheap LED-Ring for my DSLR. So folks, here is step 2:

2014-01-21 17.54.13

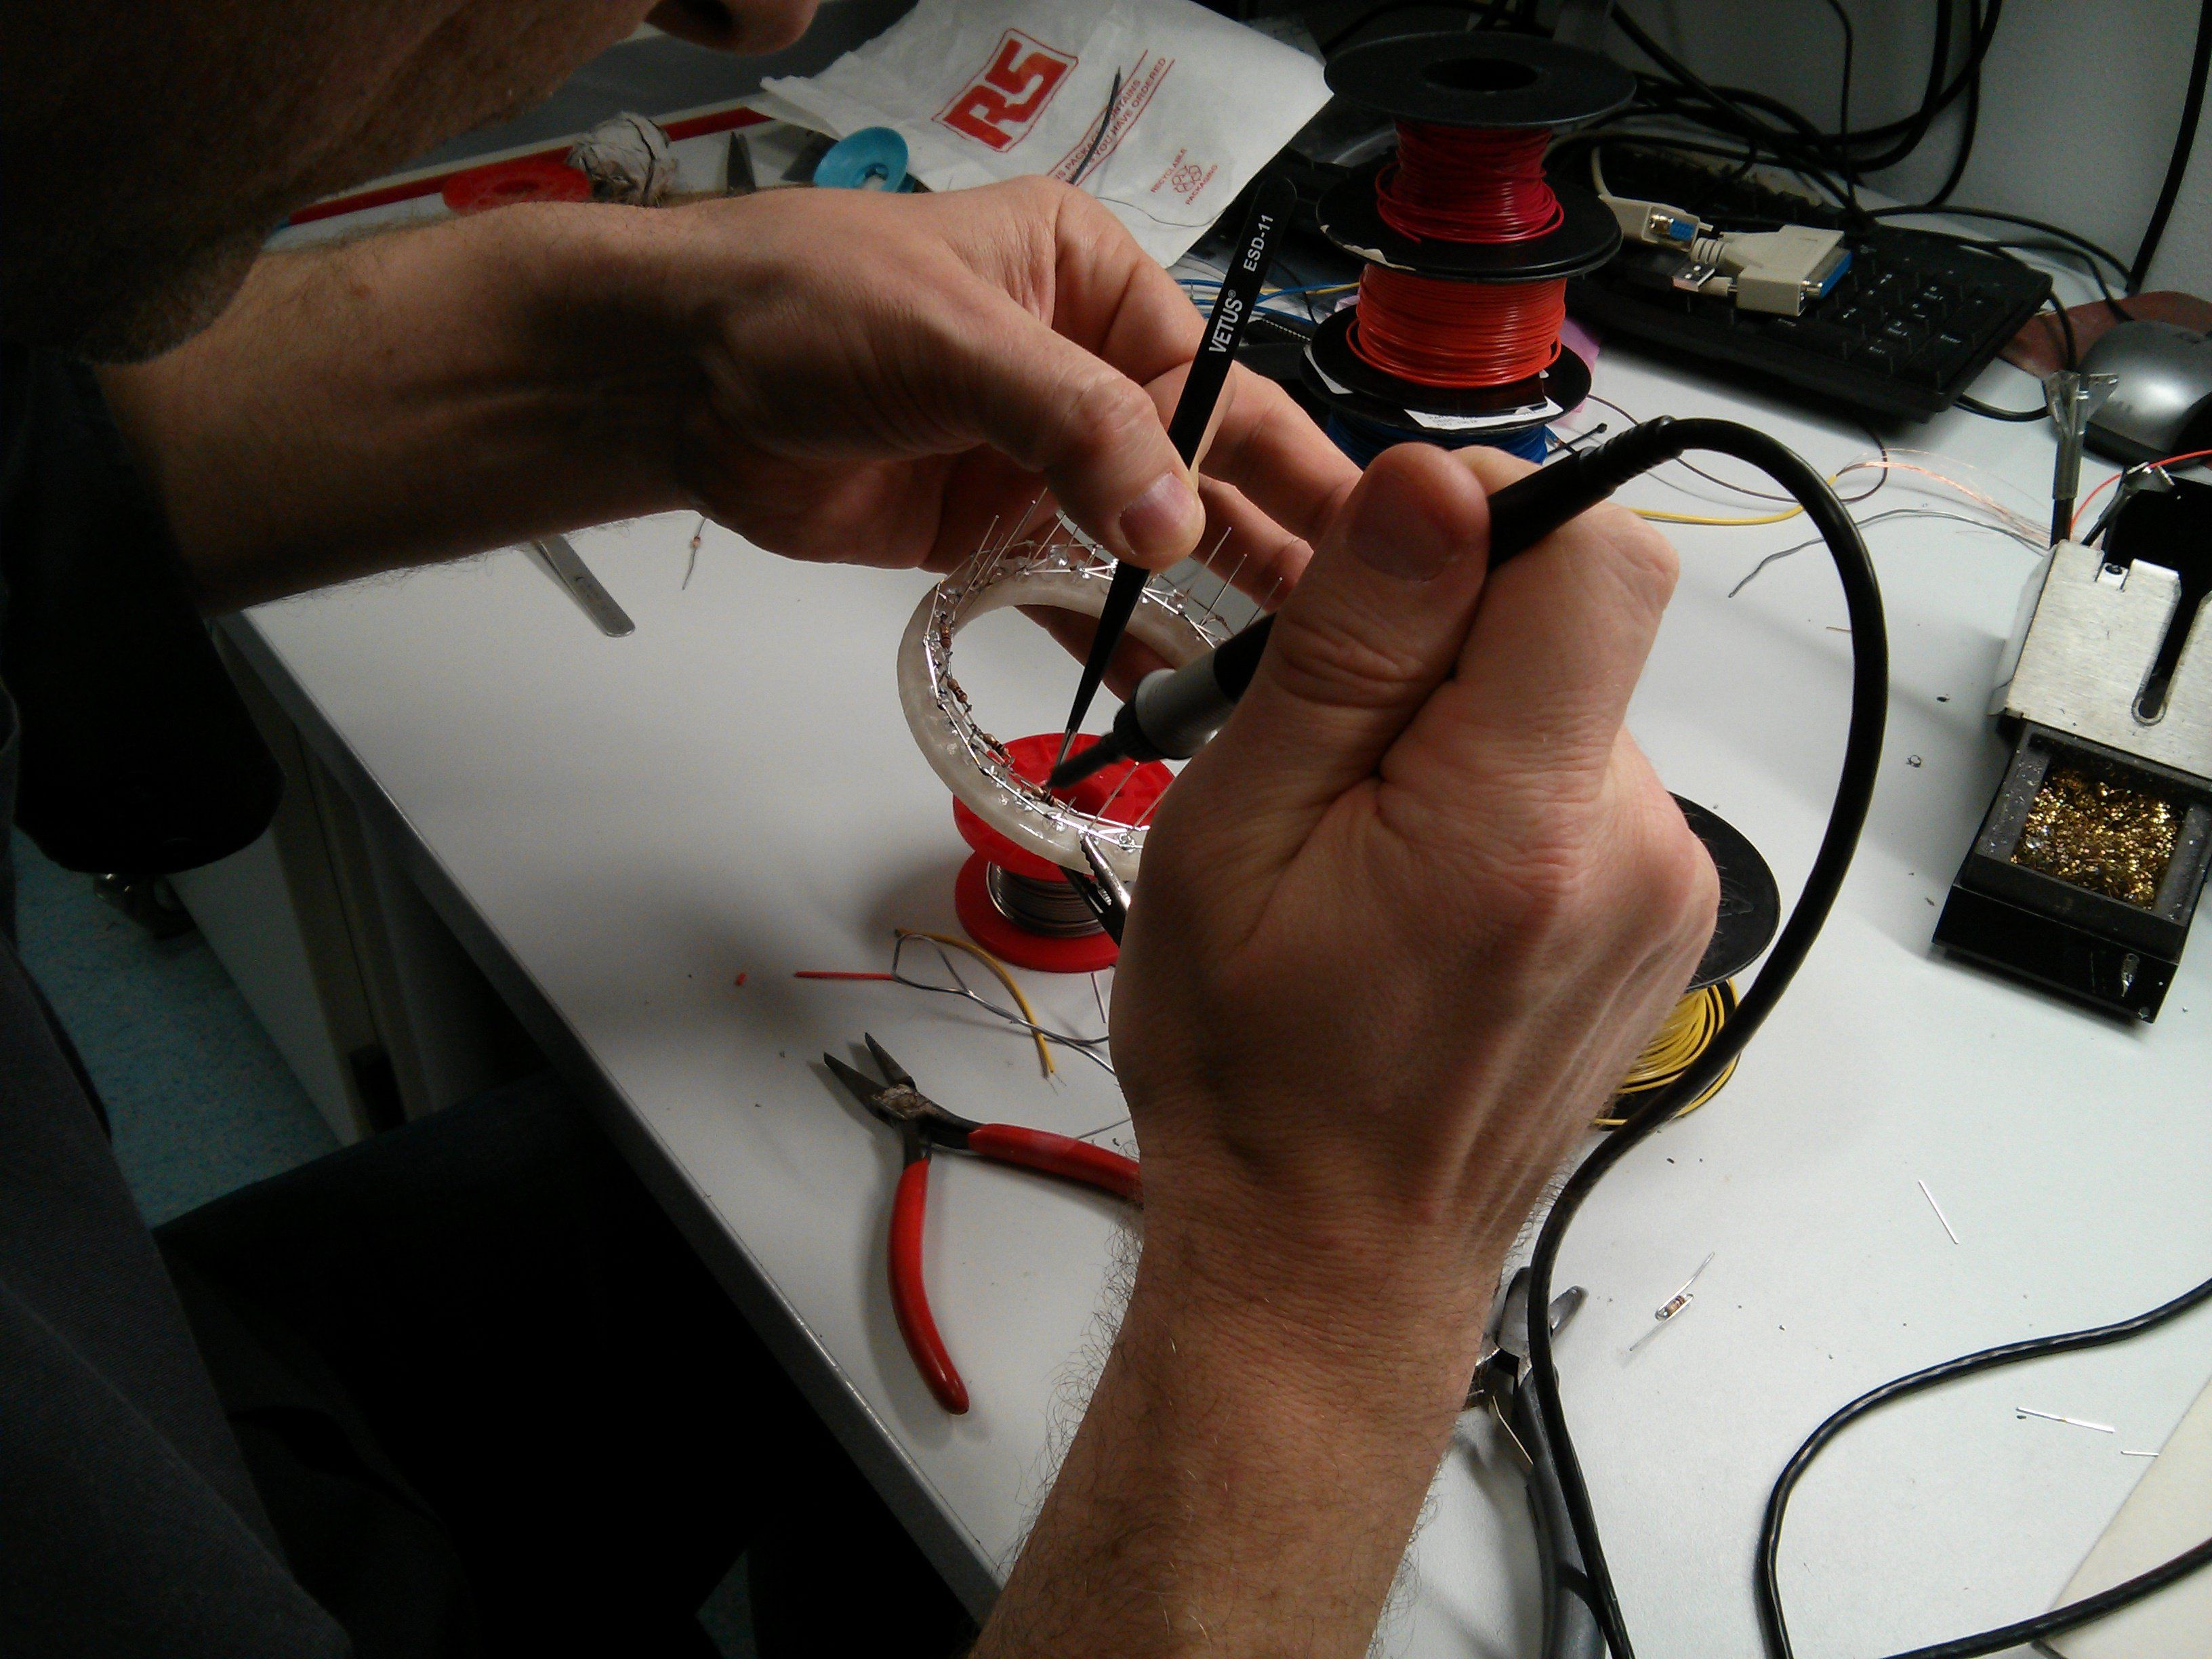
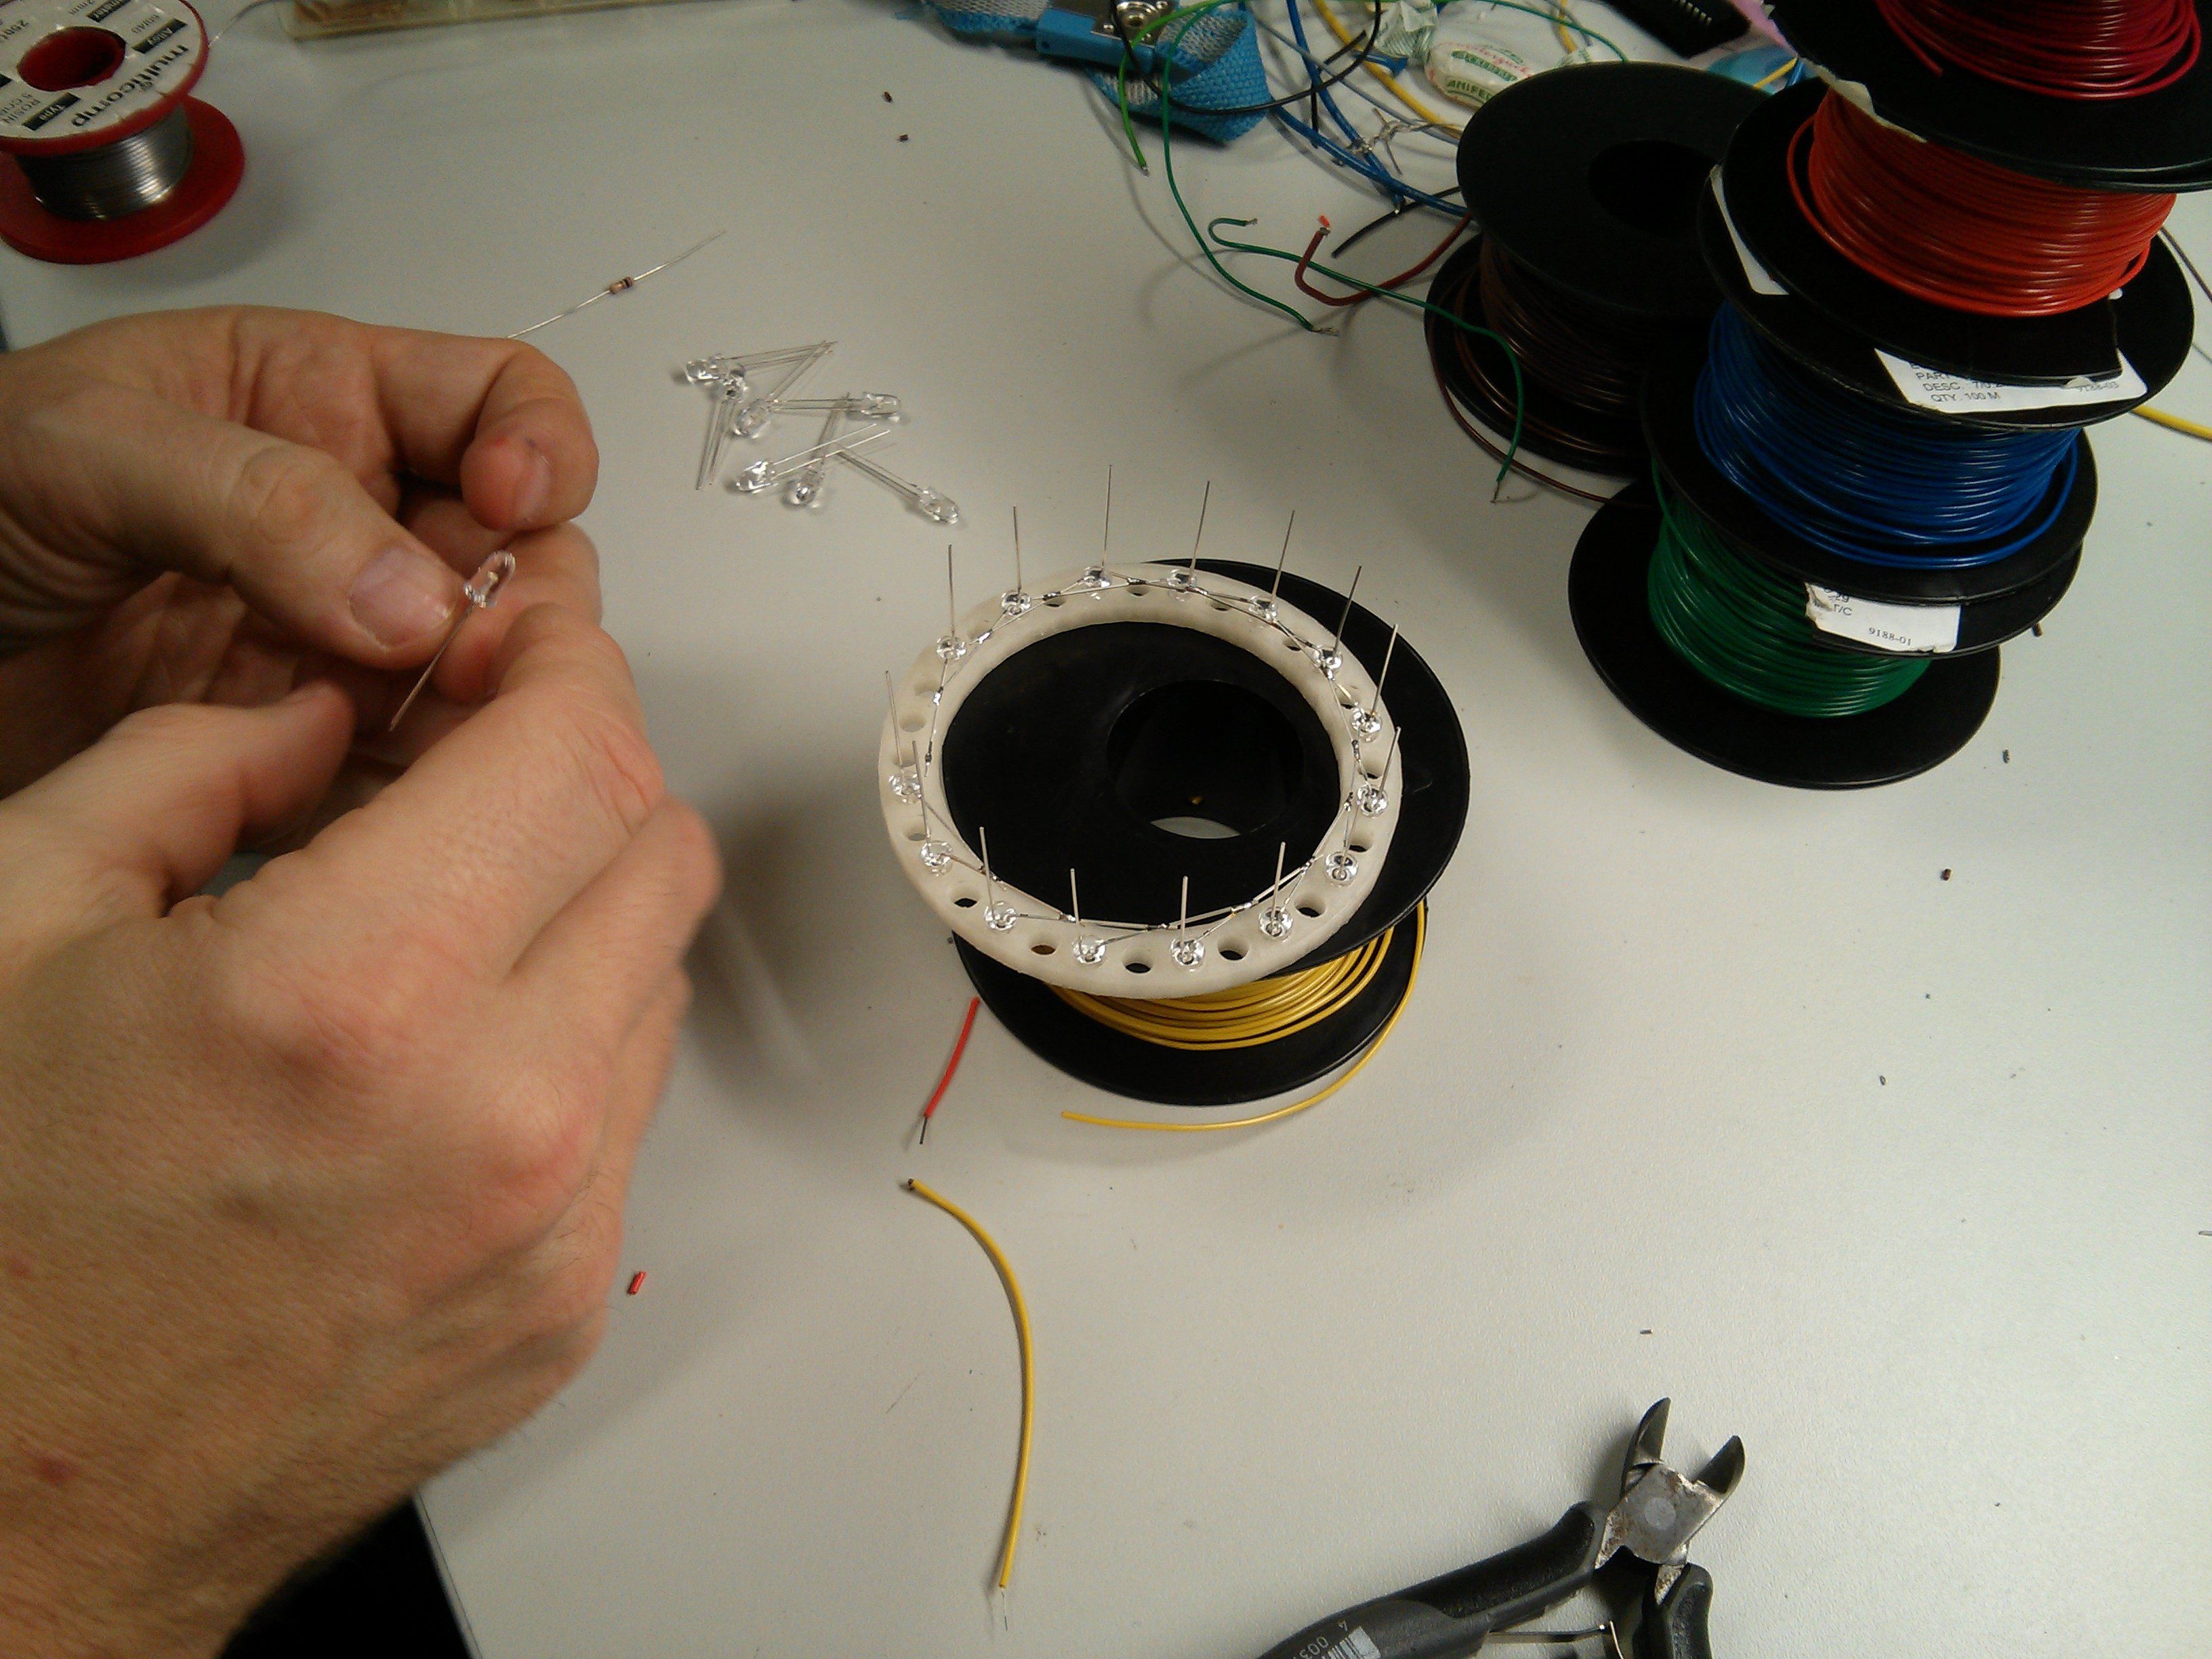
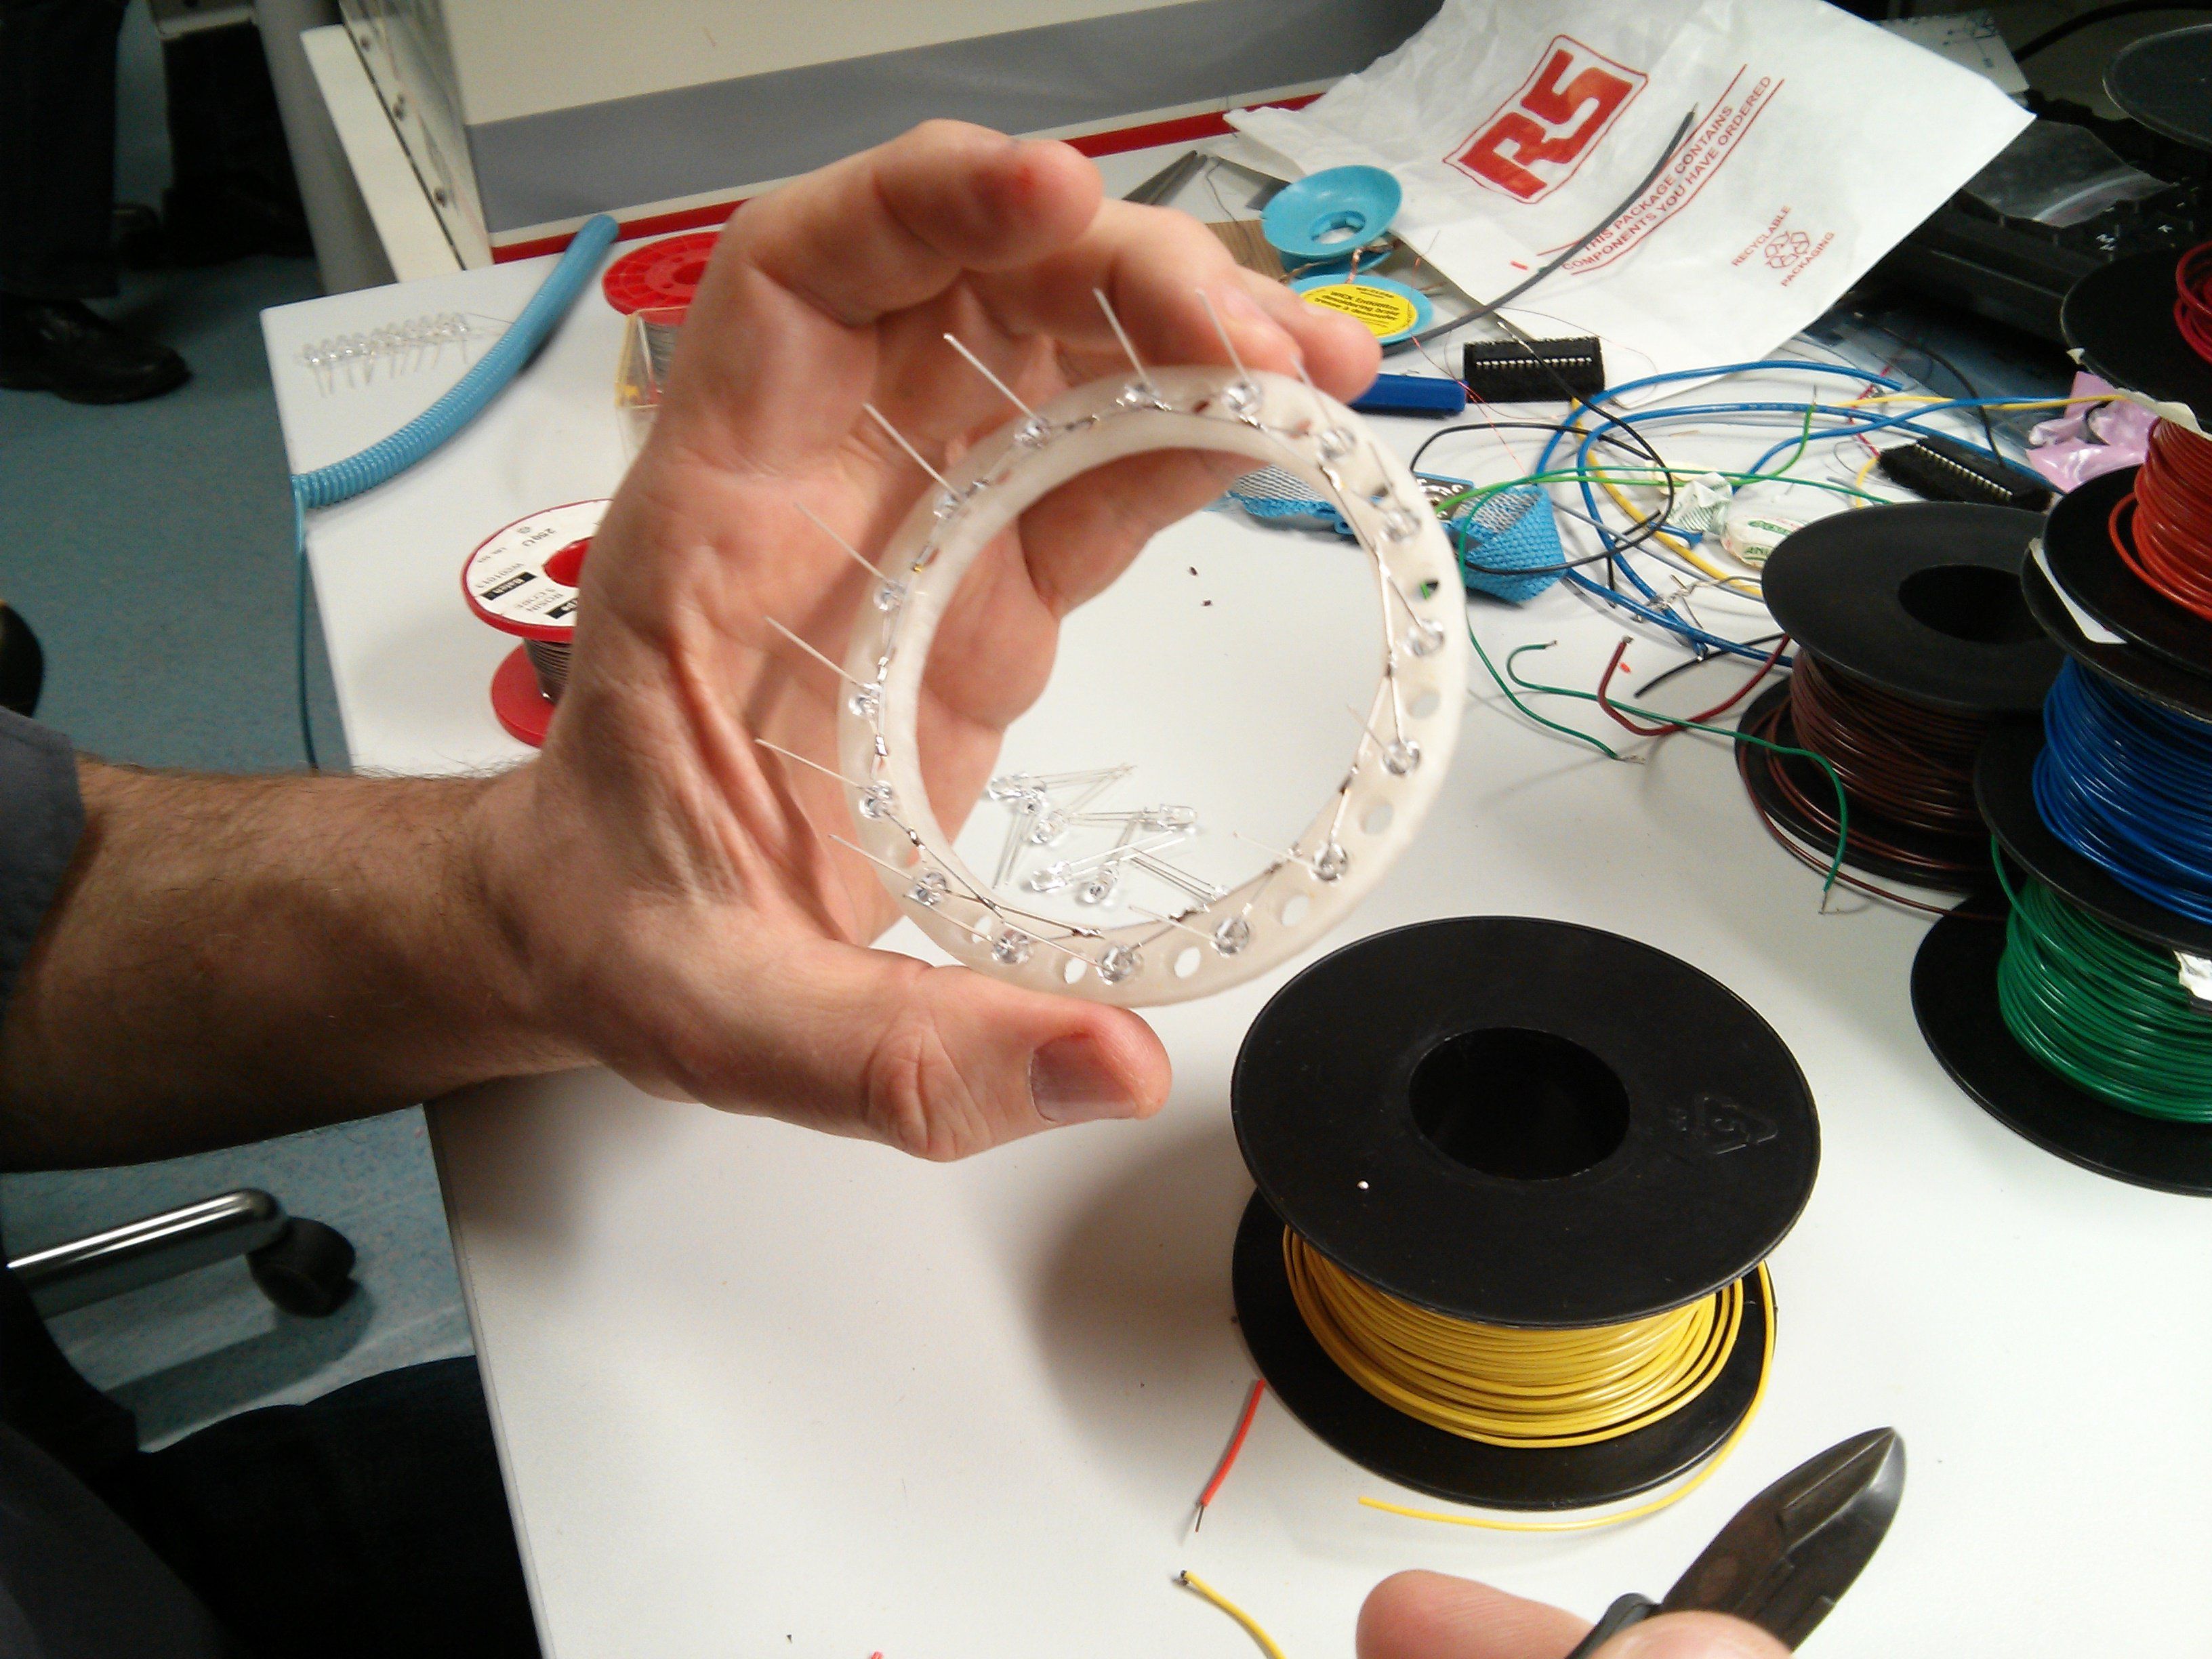
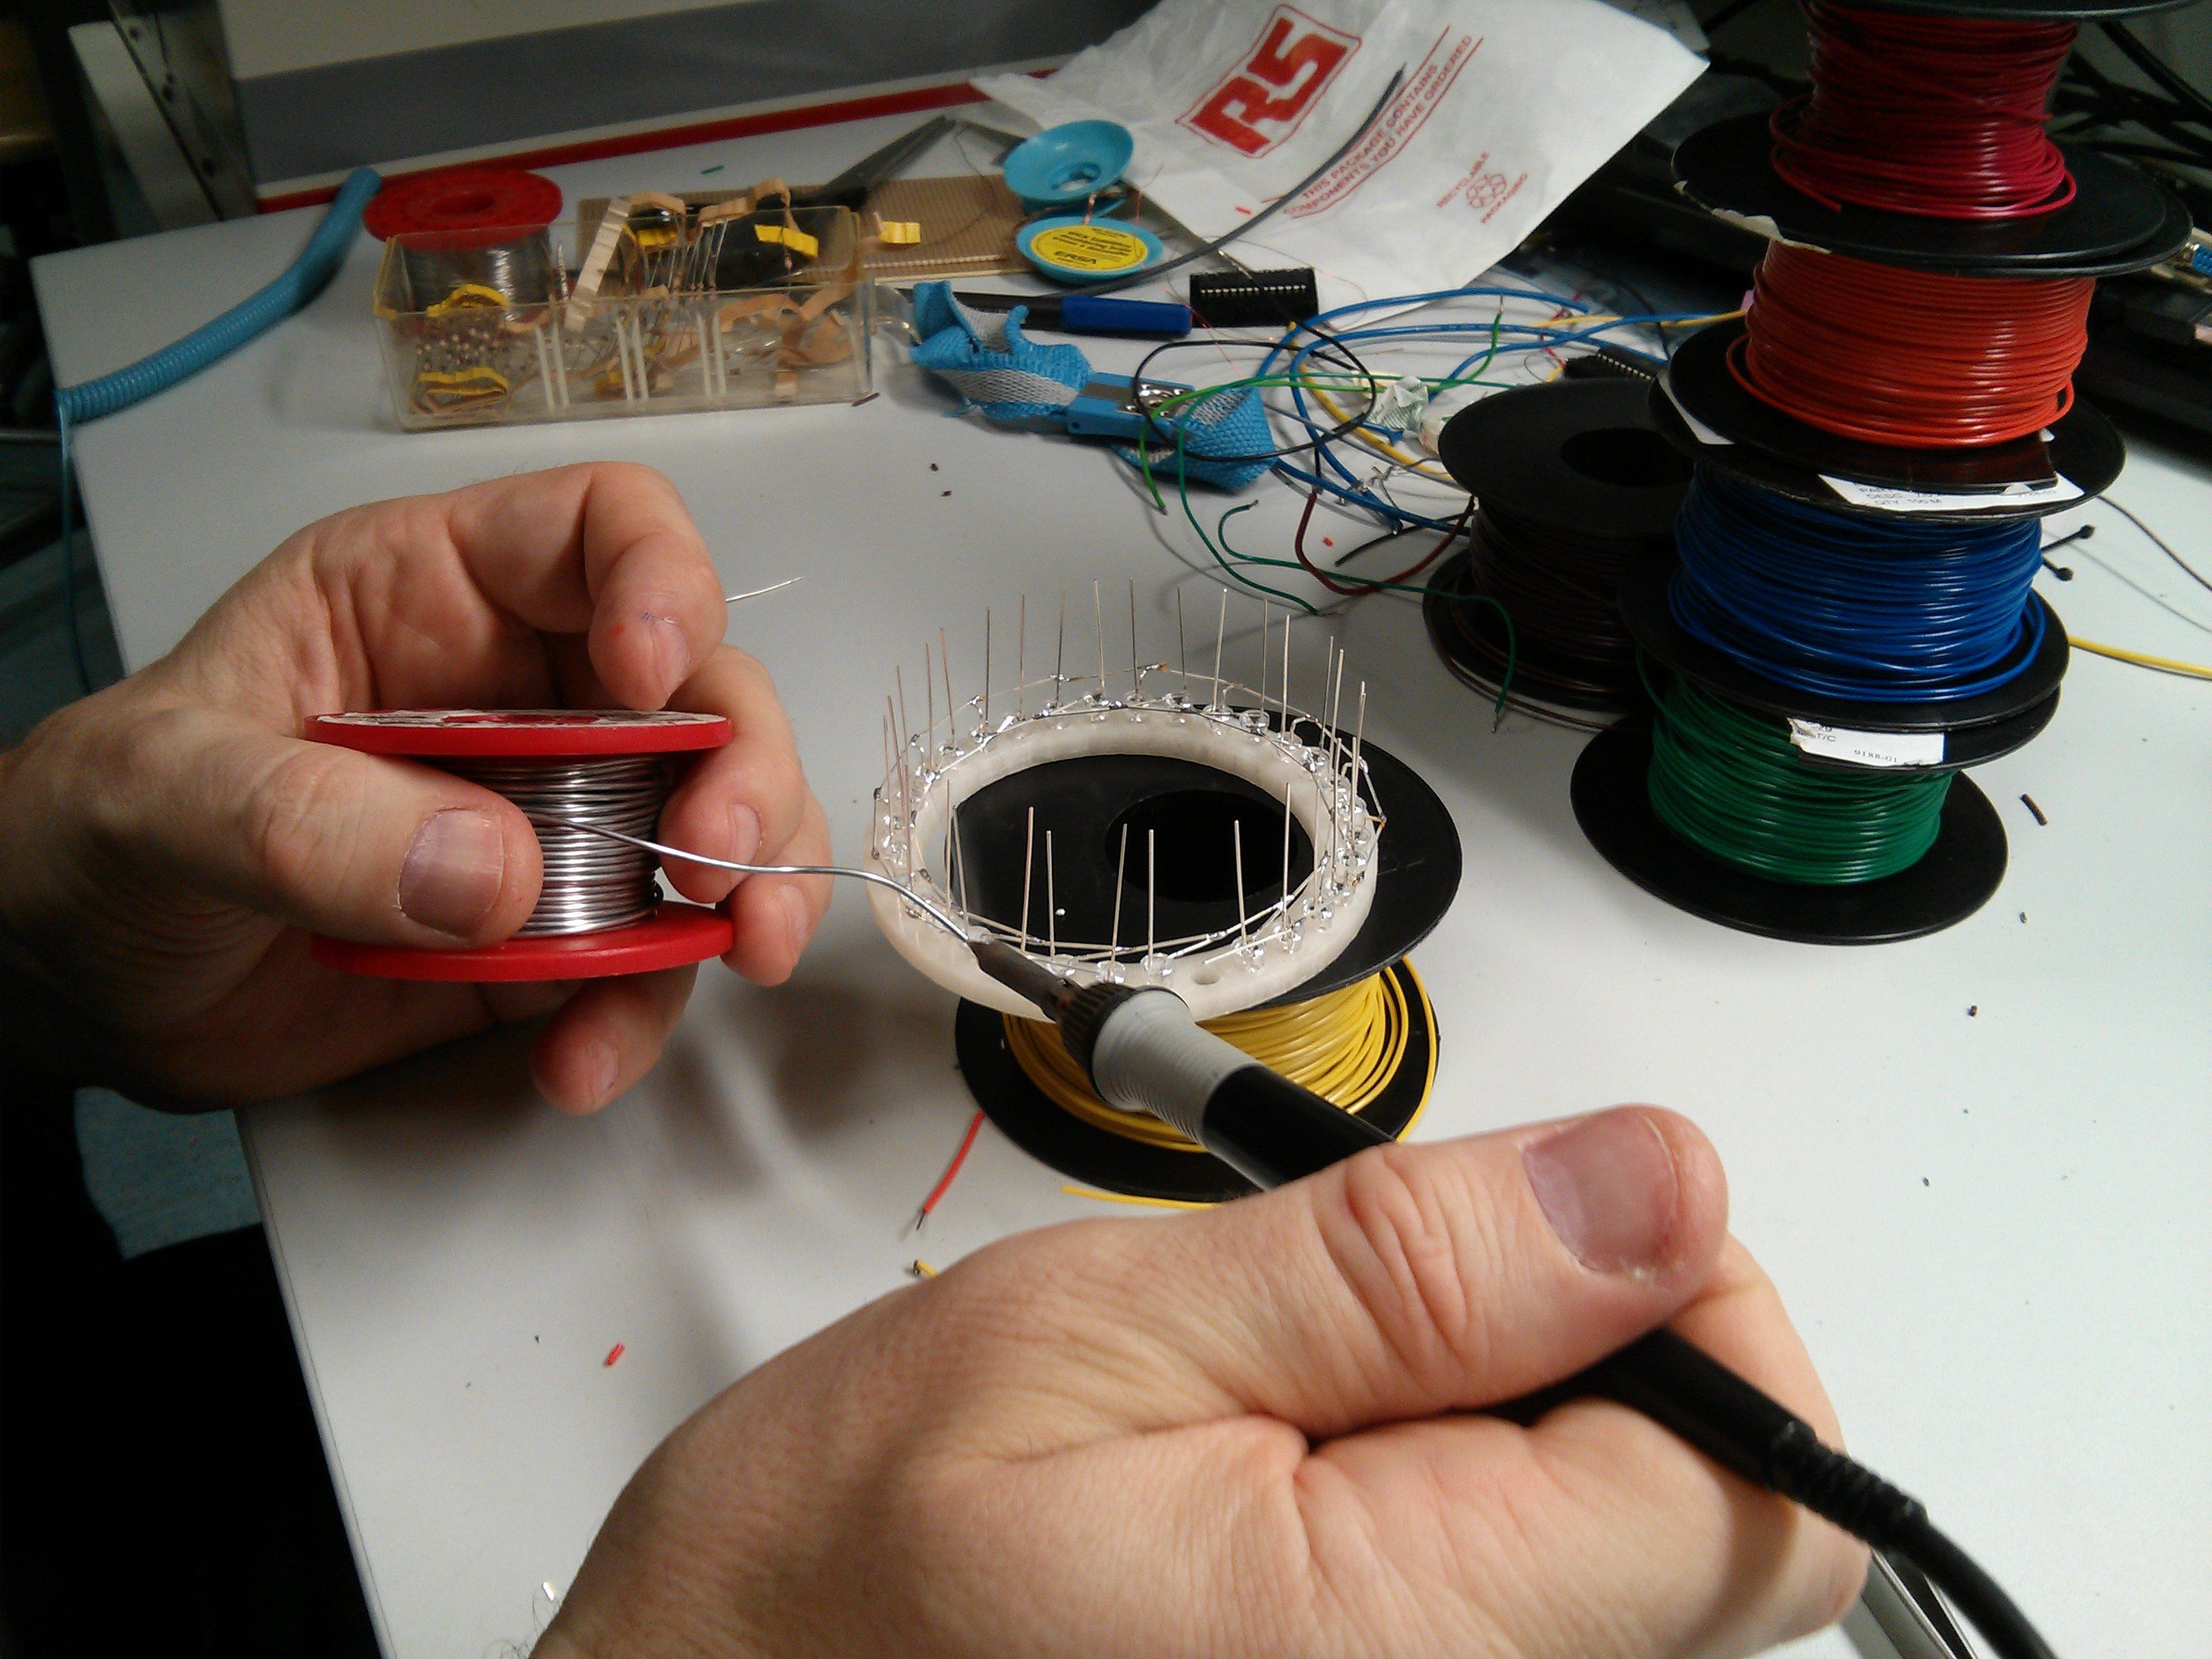
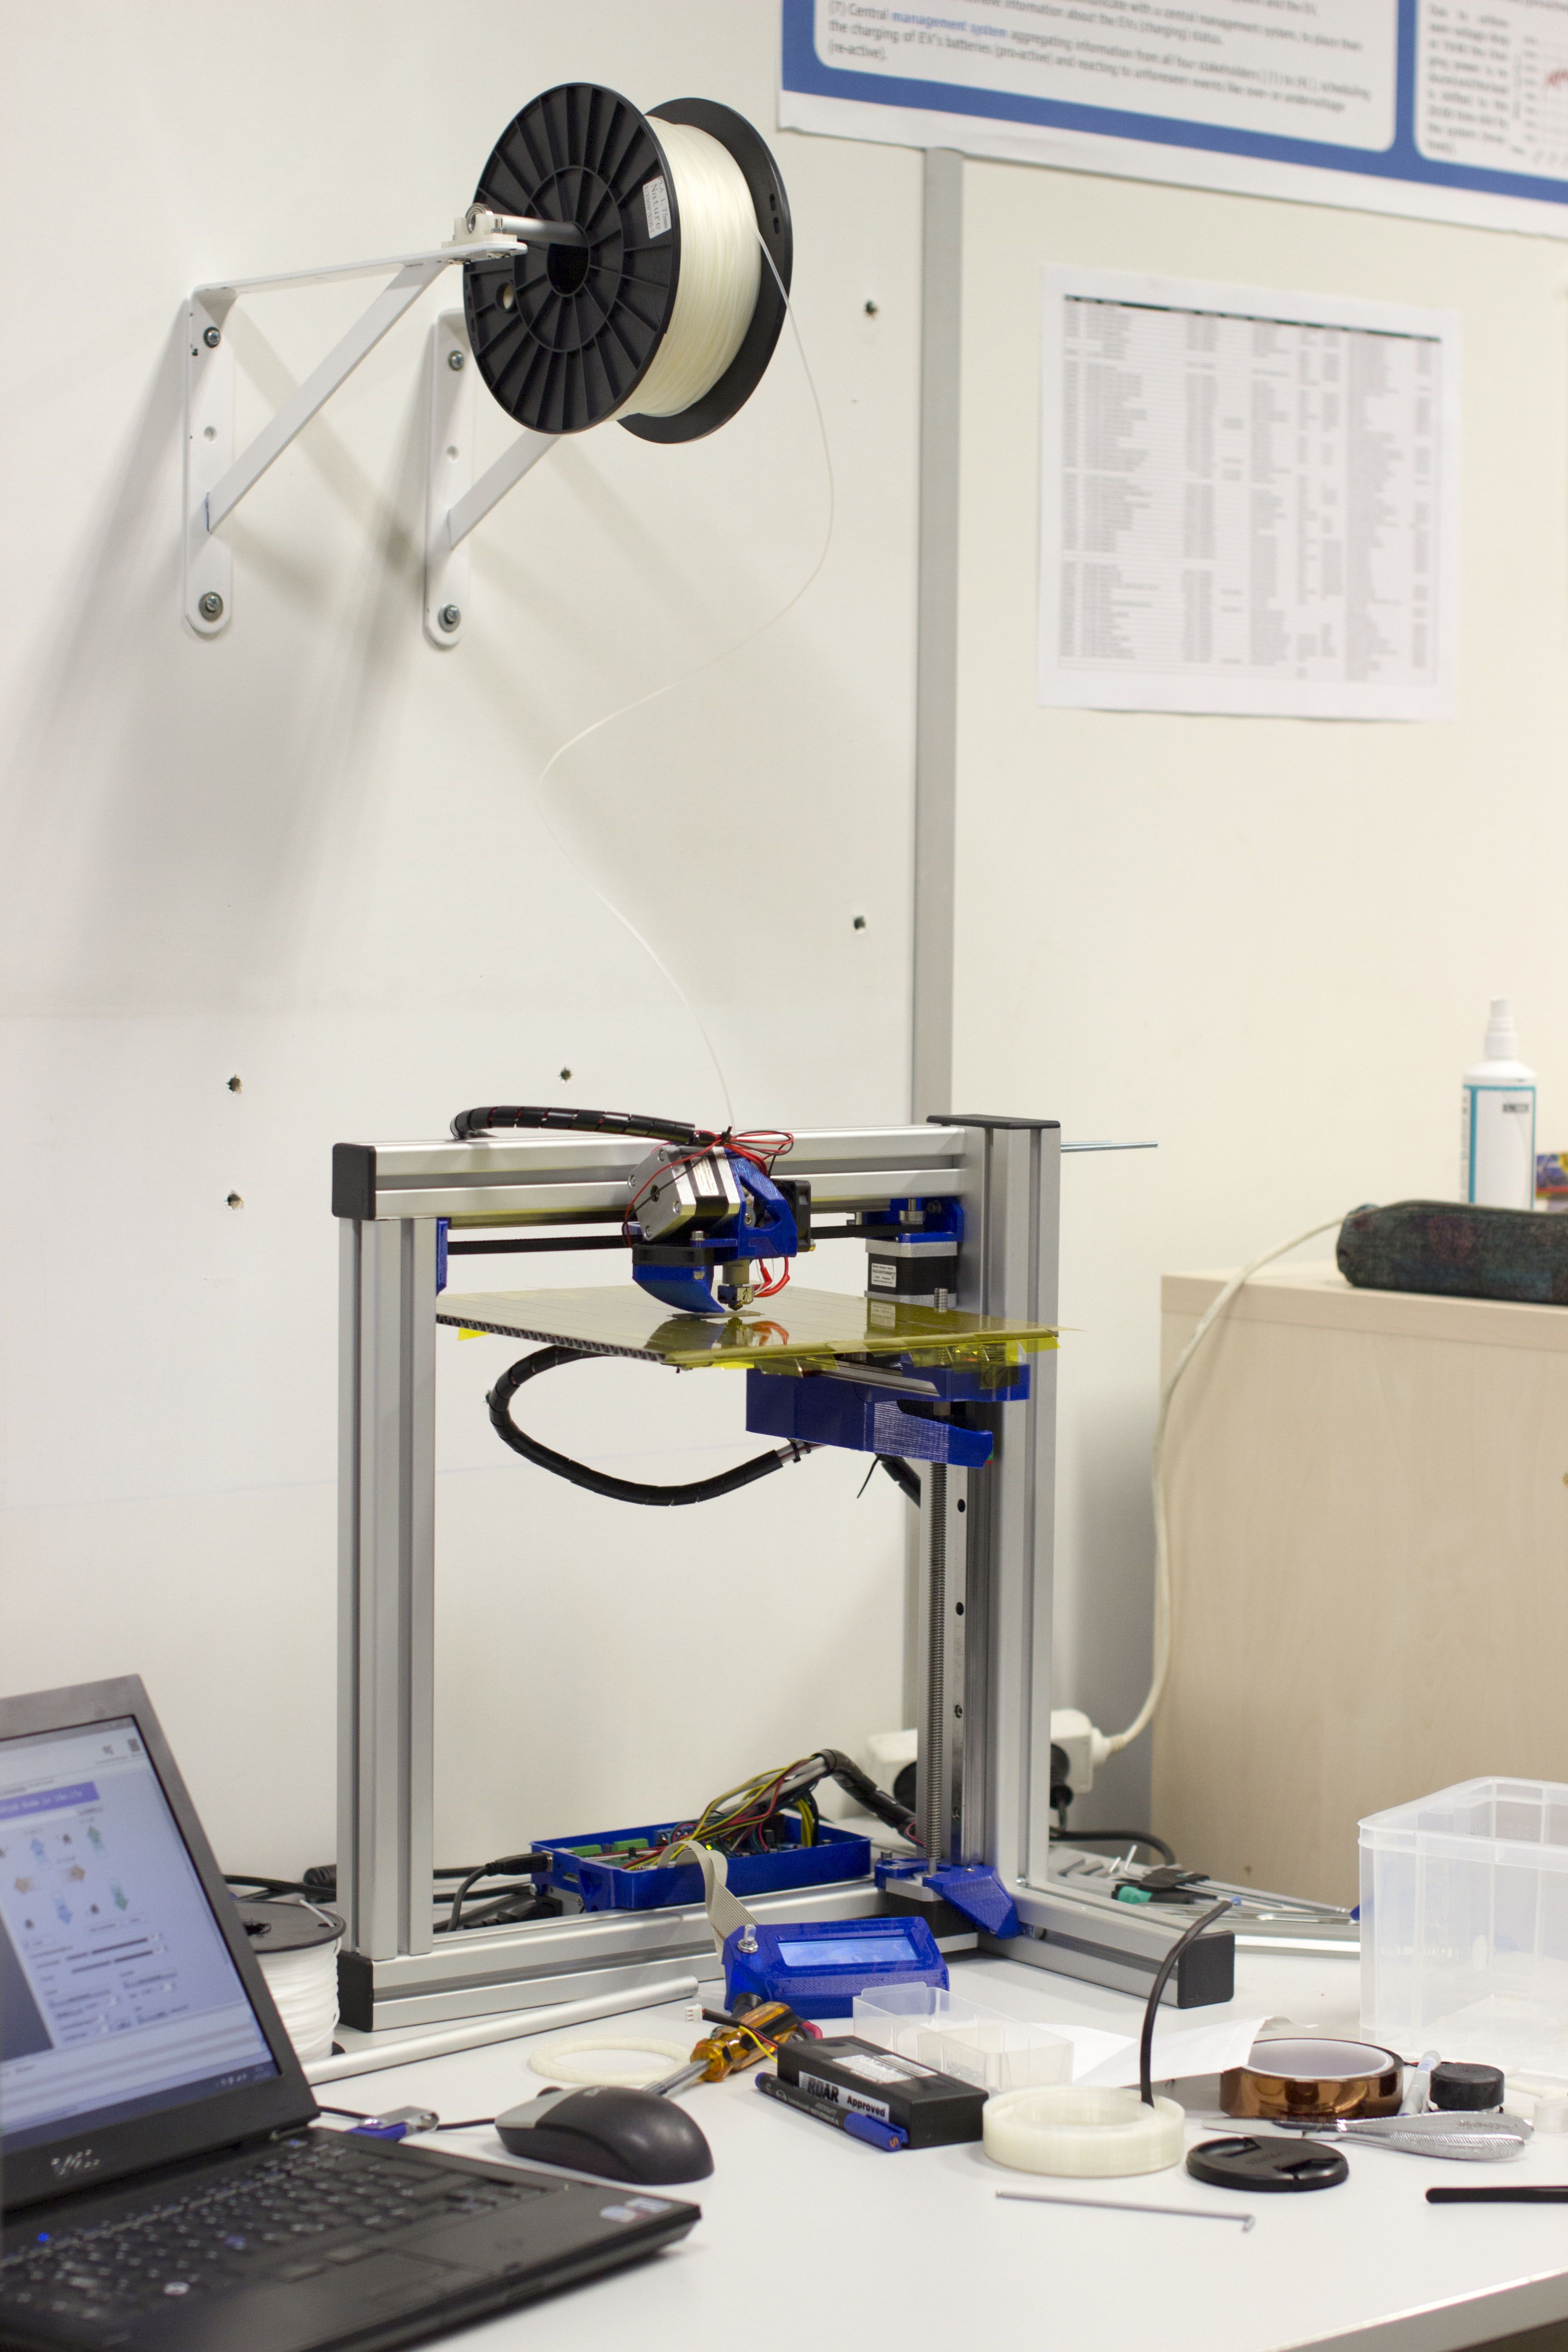
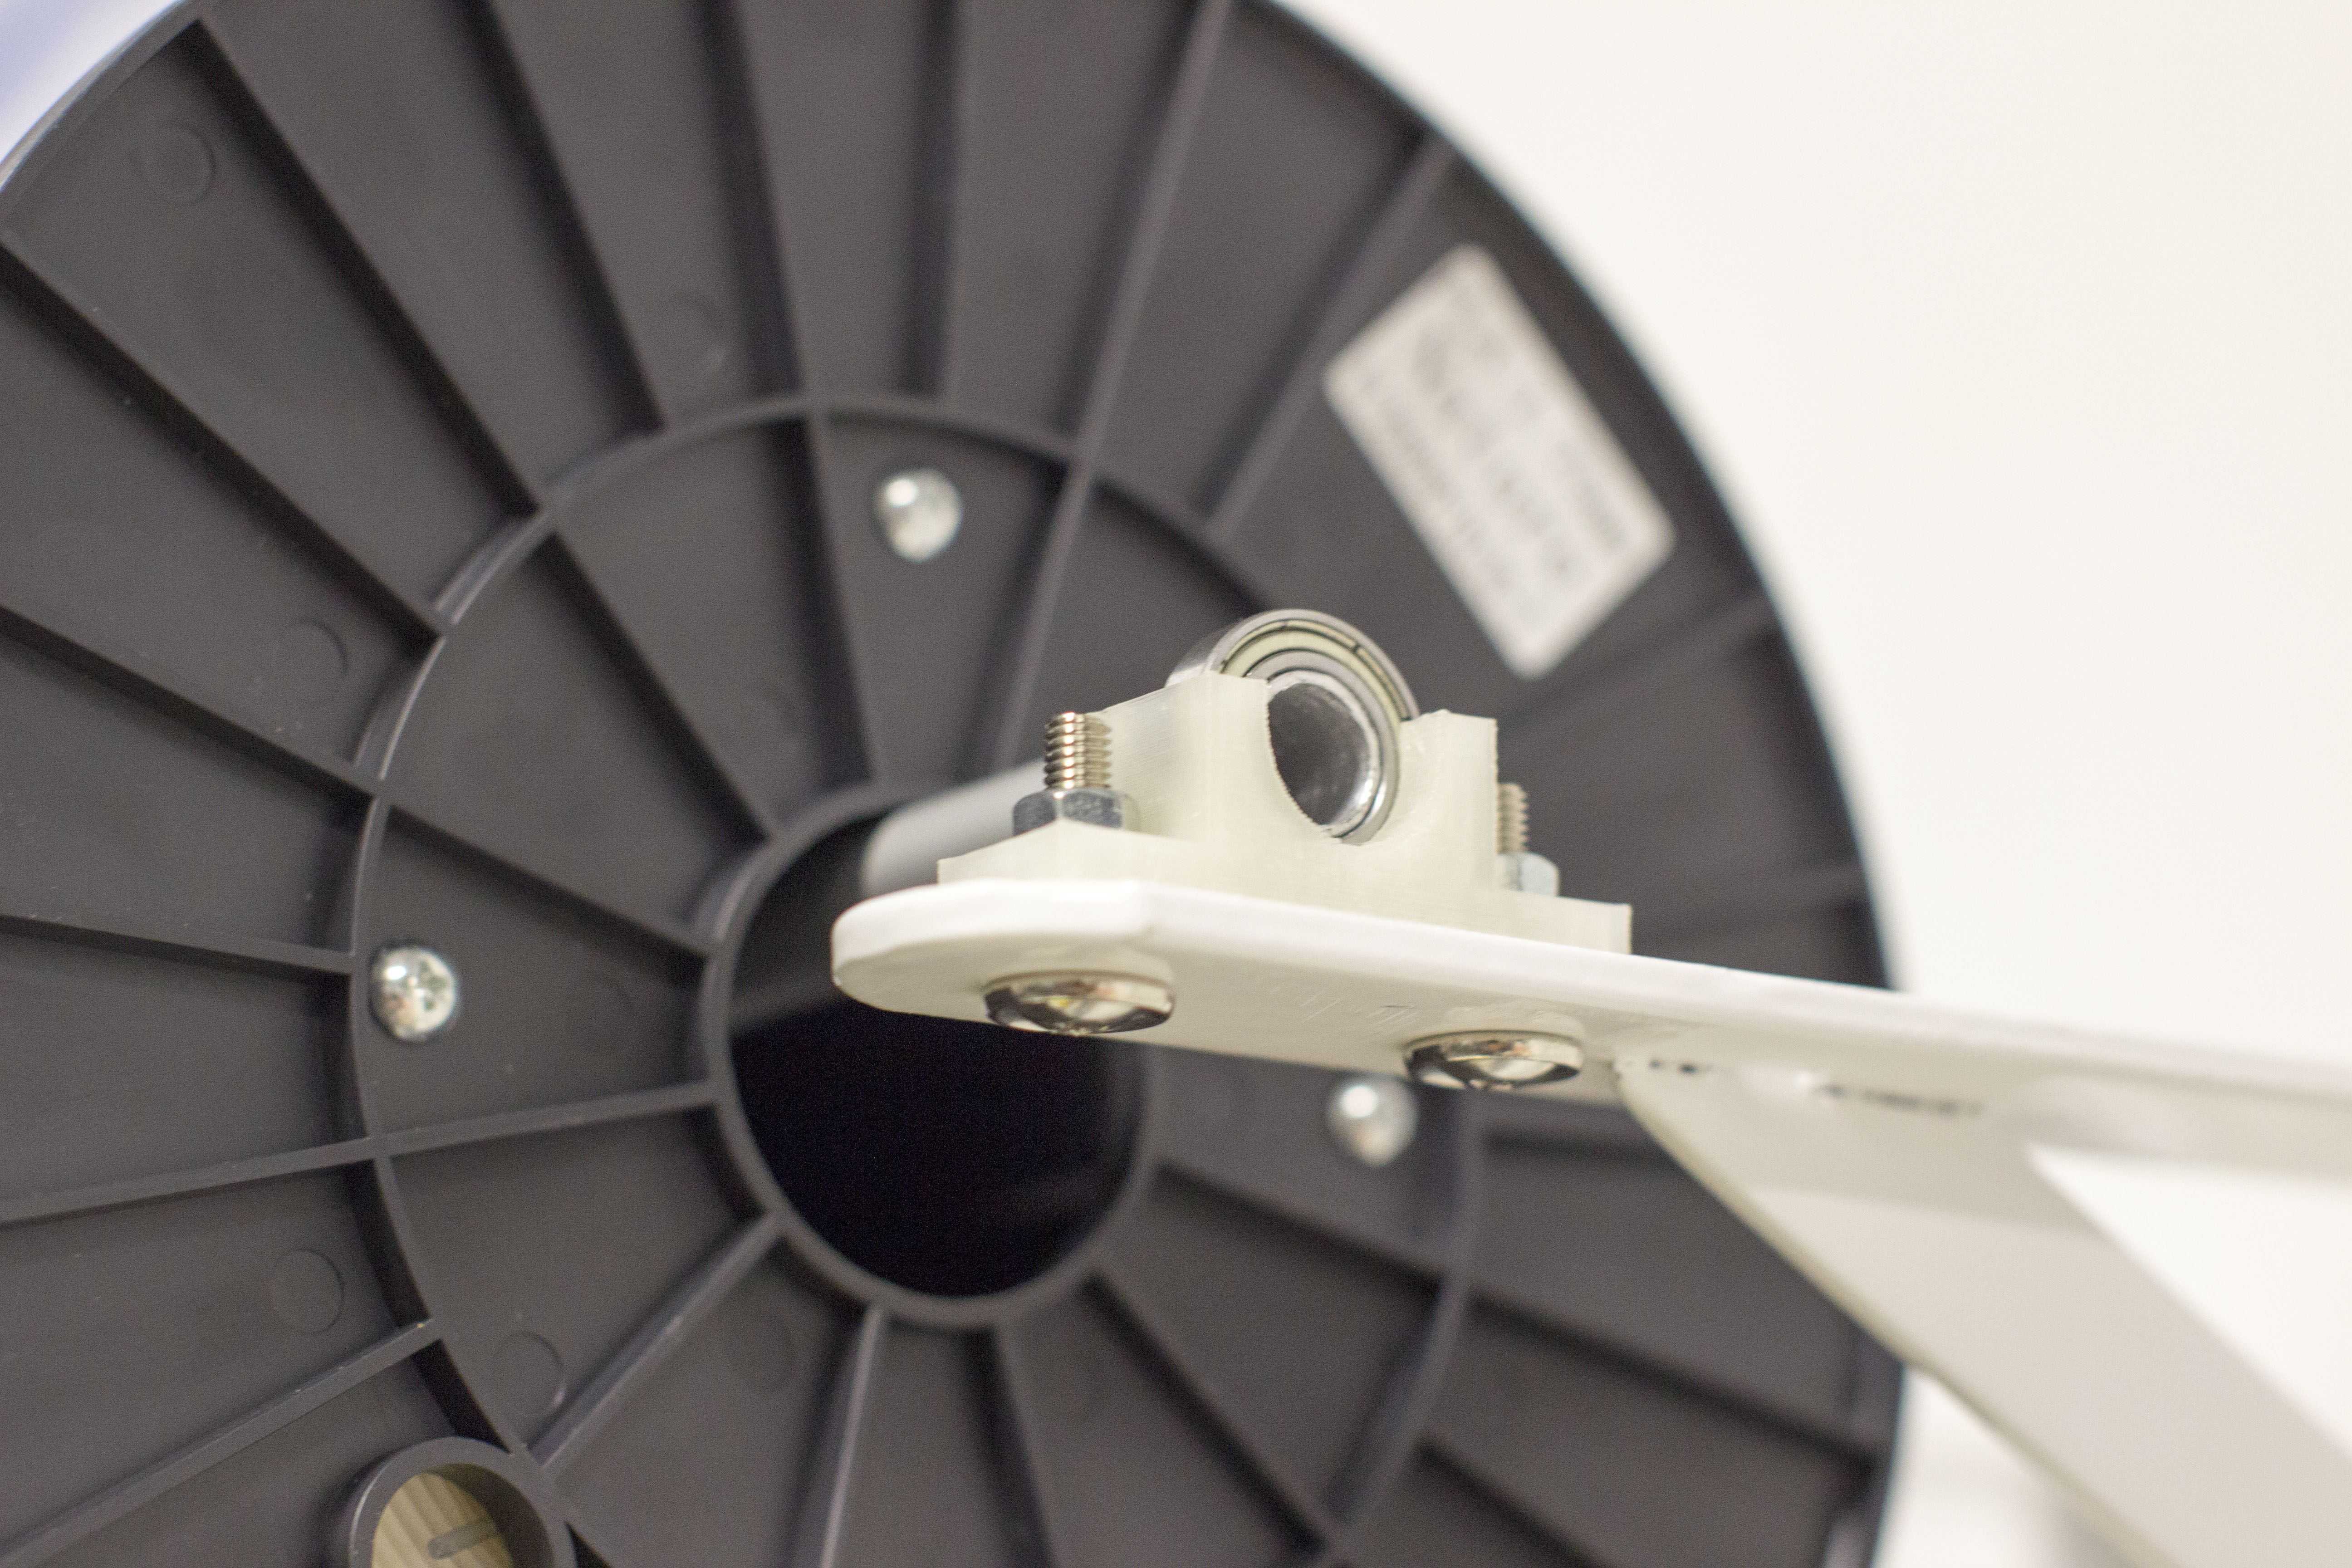
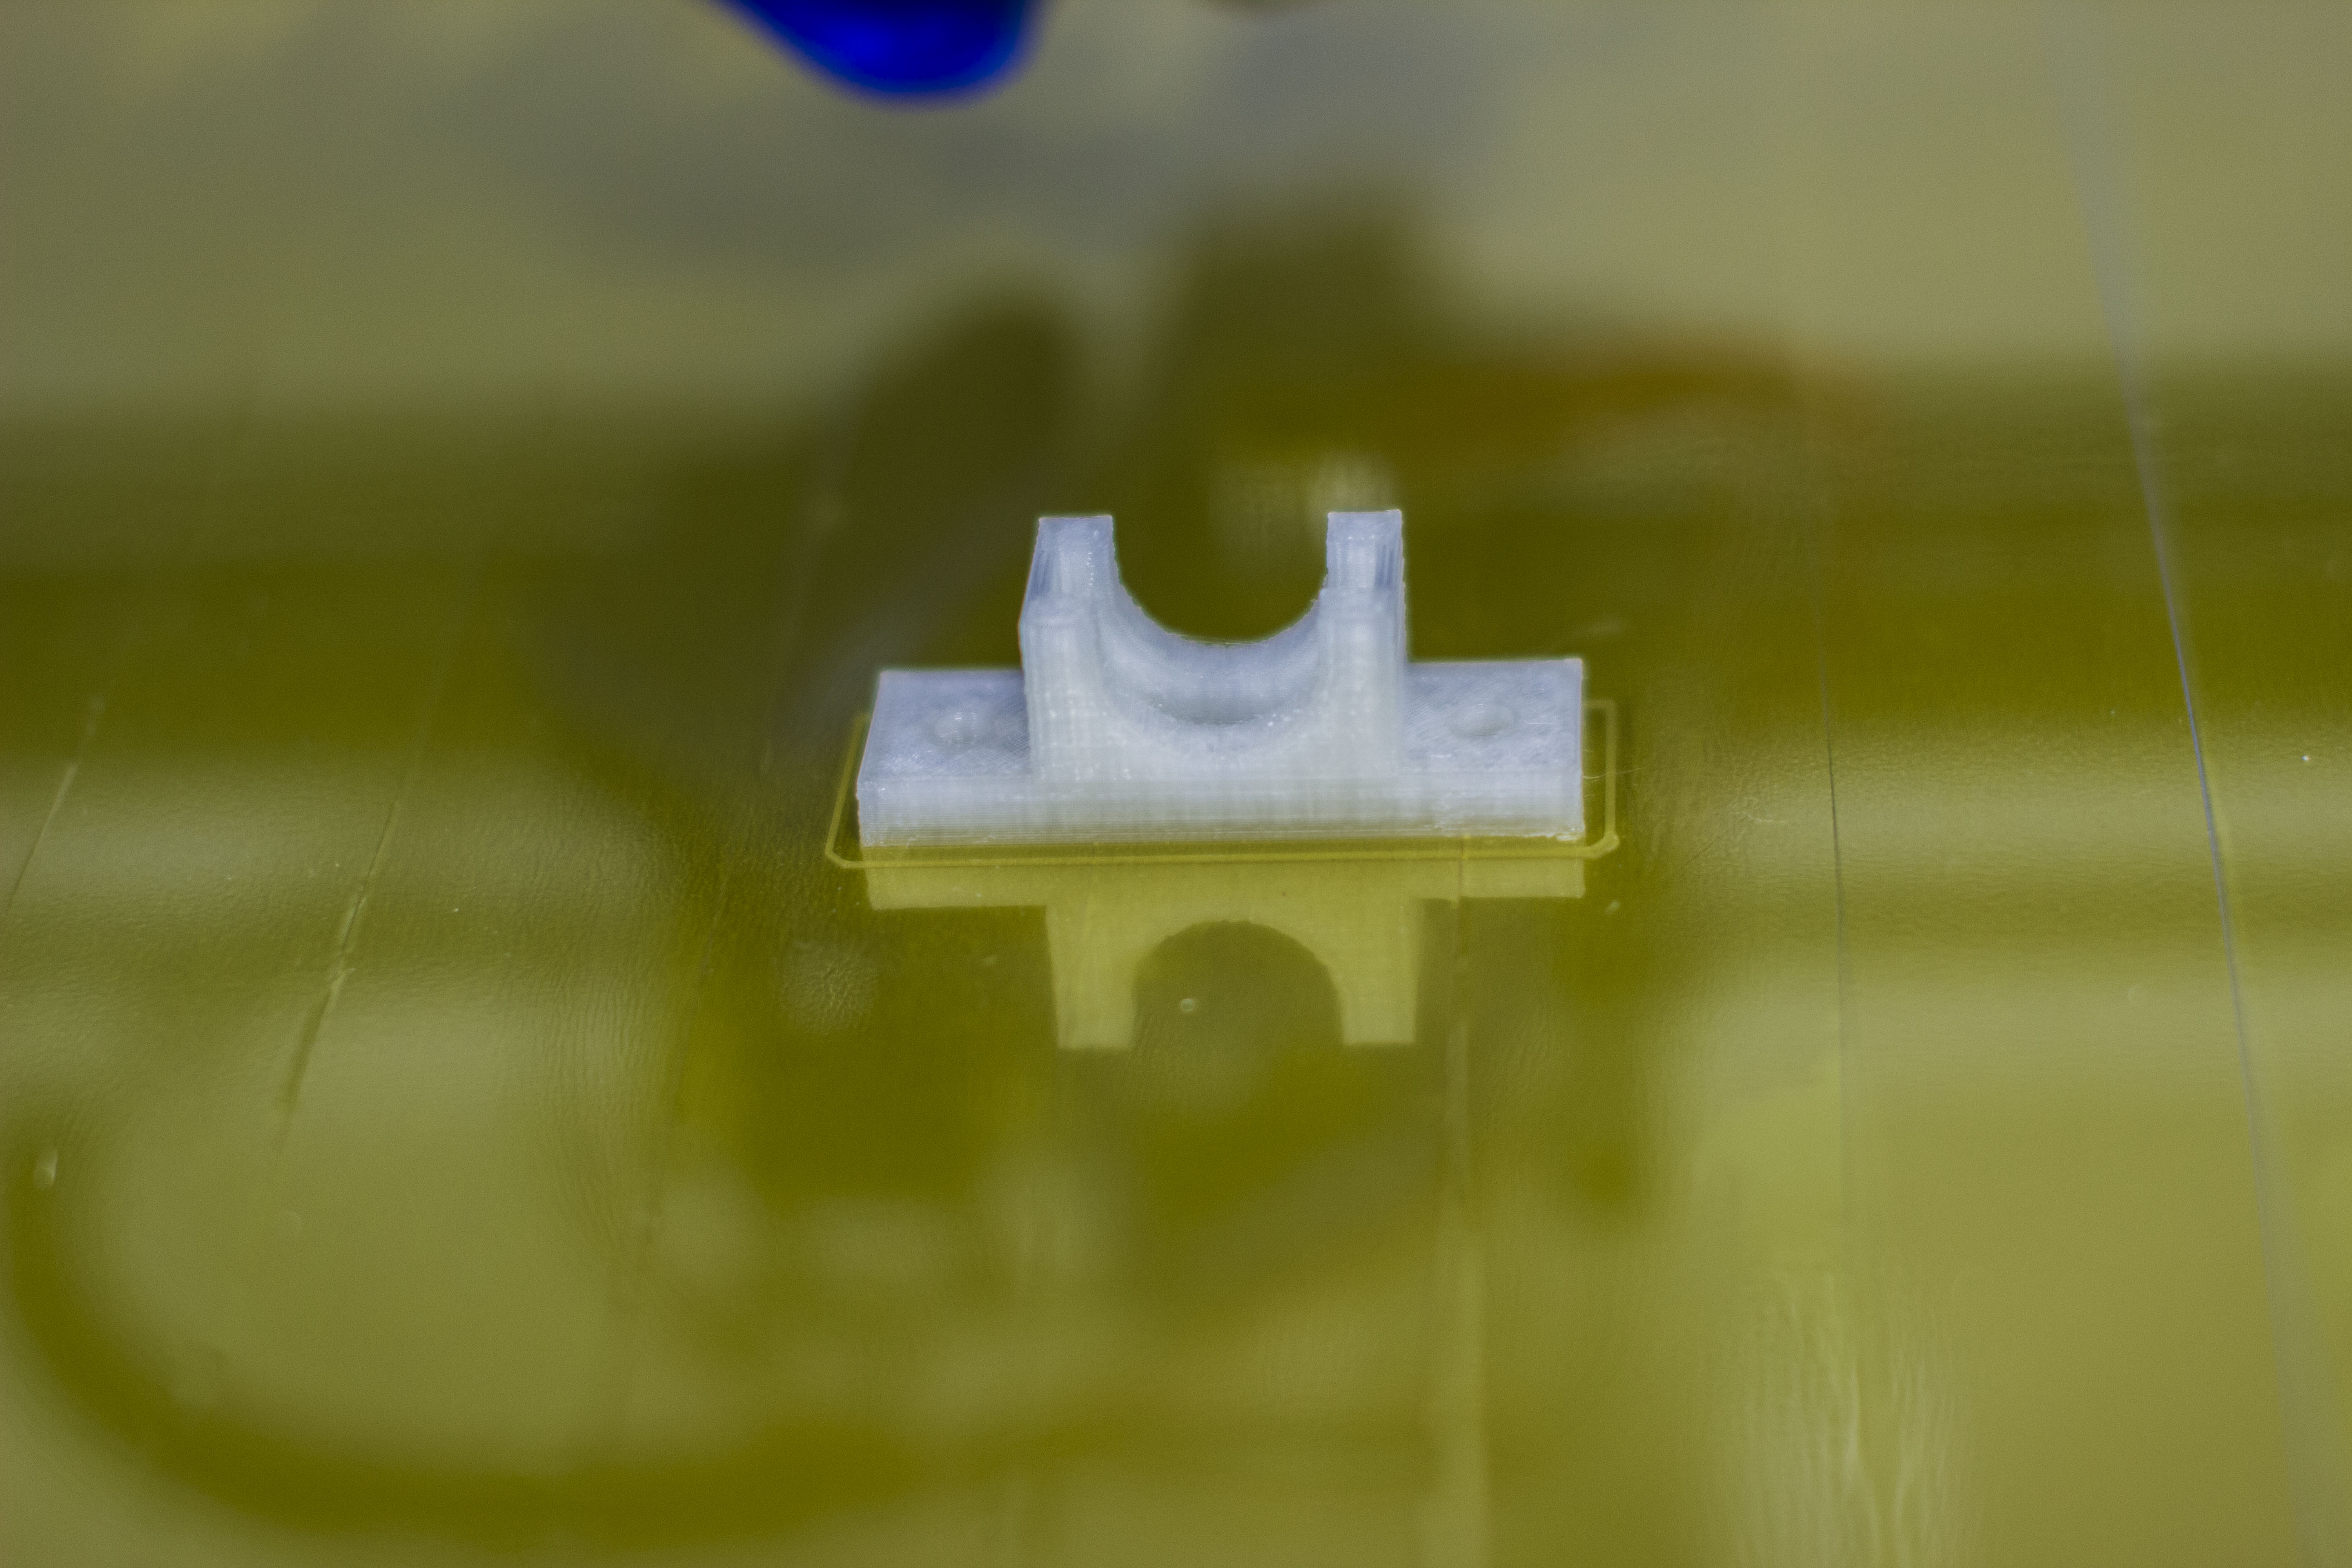
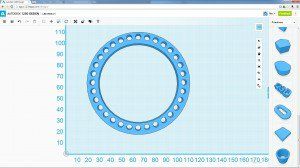
After some successful new prints with the filament holder I tuned some of the parameters for the filament (Temperature, Speed etc.) and also fine adjust the printer. After this, a new CAD project had to be done. The first draft i cam up with was a single tube with 90×90 mm and 5 mm thick. For the inner diameter I choose 70 mm in order to fit a 77 mm filter winding for my Sigma 50 mm /1.4. This Lens have a 77 mm filter winding but the lens is actually only 67 mm in diameter. I fitted 32 holes in it, each 5 mm diameter because the most LEDs have 5 mm, and print it. During the print I searched for LEDs. I ended up with 40 LW514 because they have a luminous intensity of around 35 cd. This will give me in sum 1120 cd with an beam angle of 15°. This will give me around 4000 lx in a distance of 0.5 m and 1100 in a distance of 1 m. For example a TV studio have around 1000 lx.

2014-01-22 18.36.43
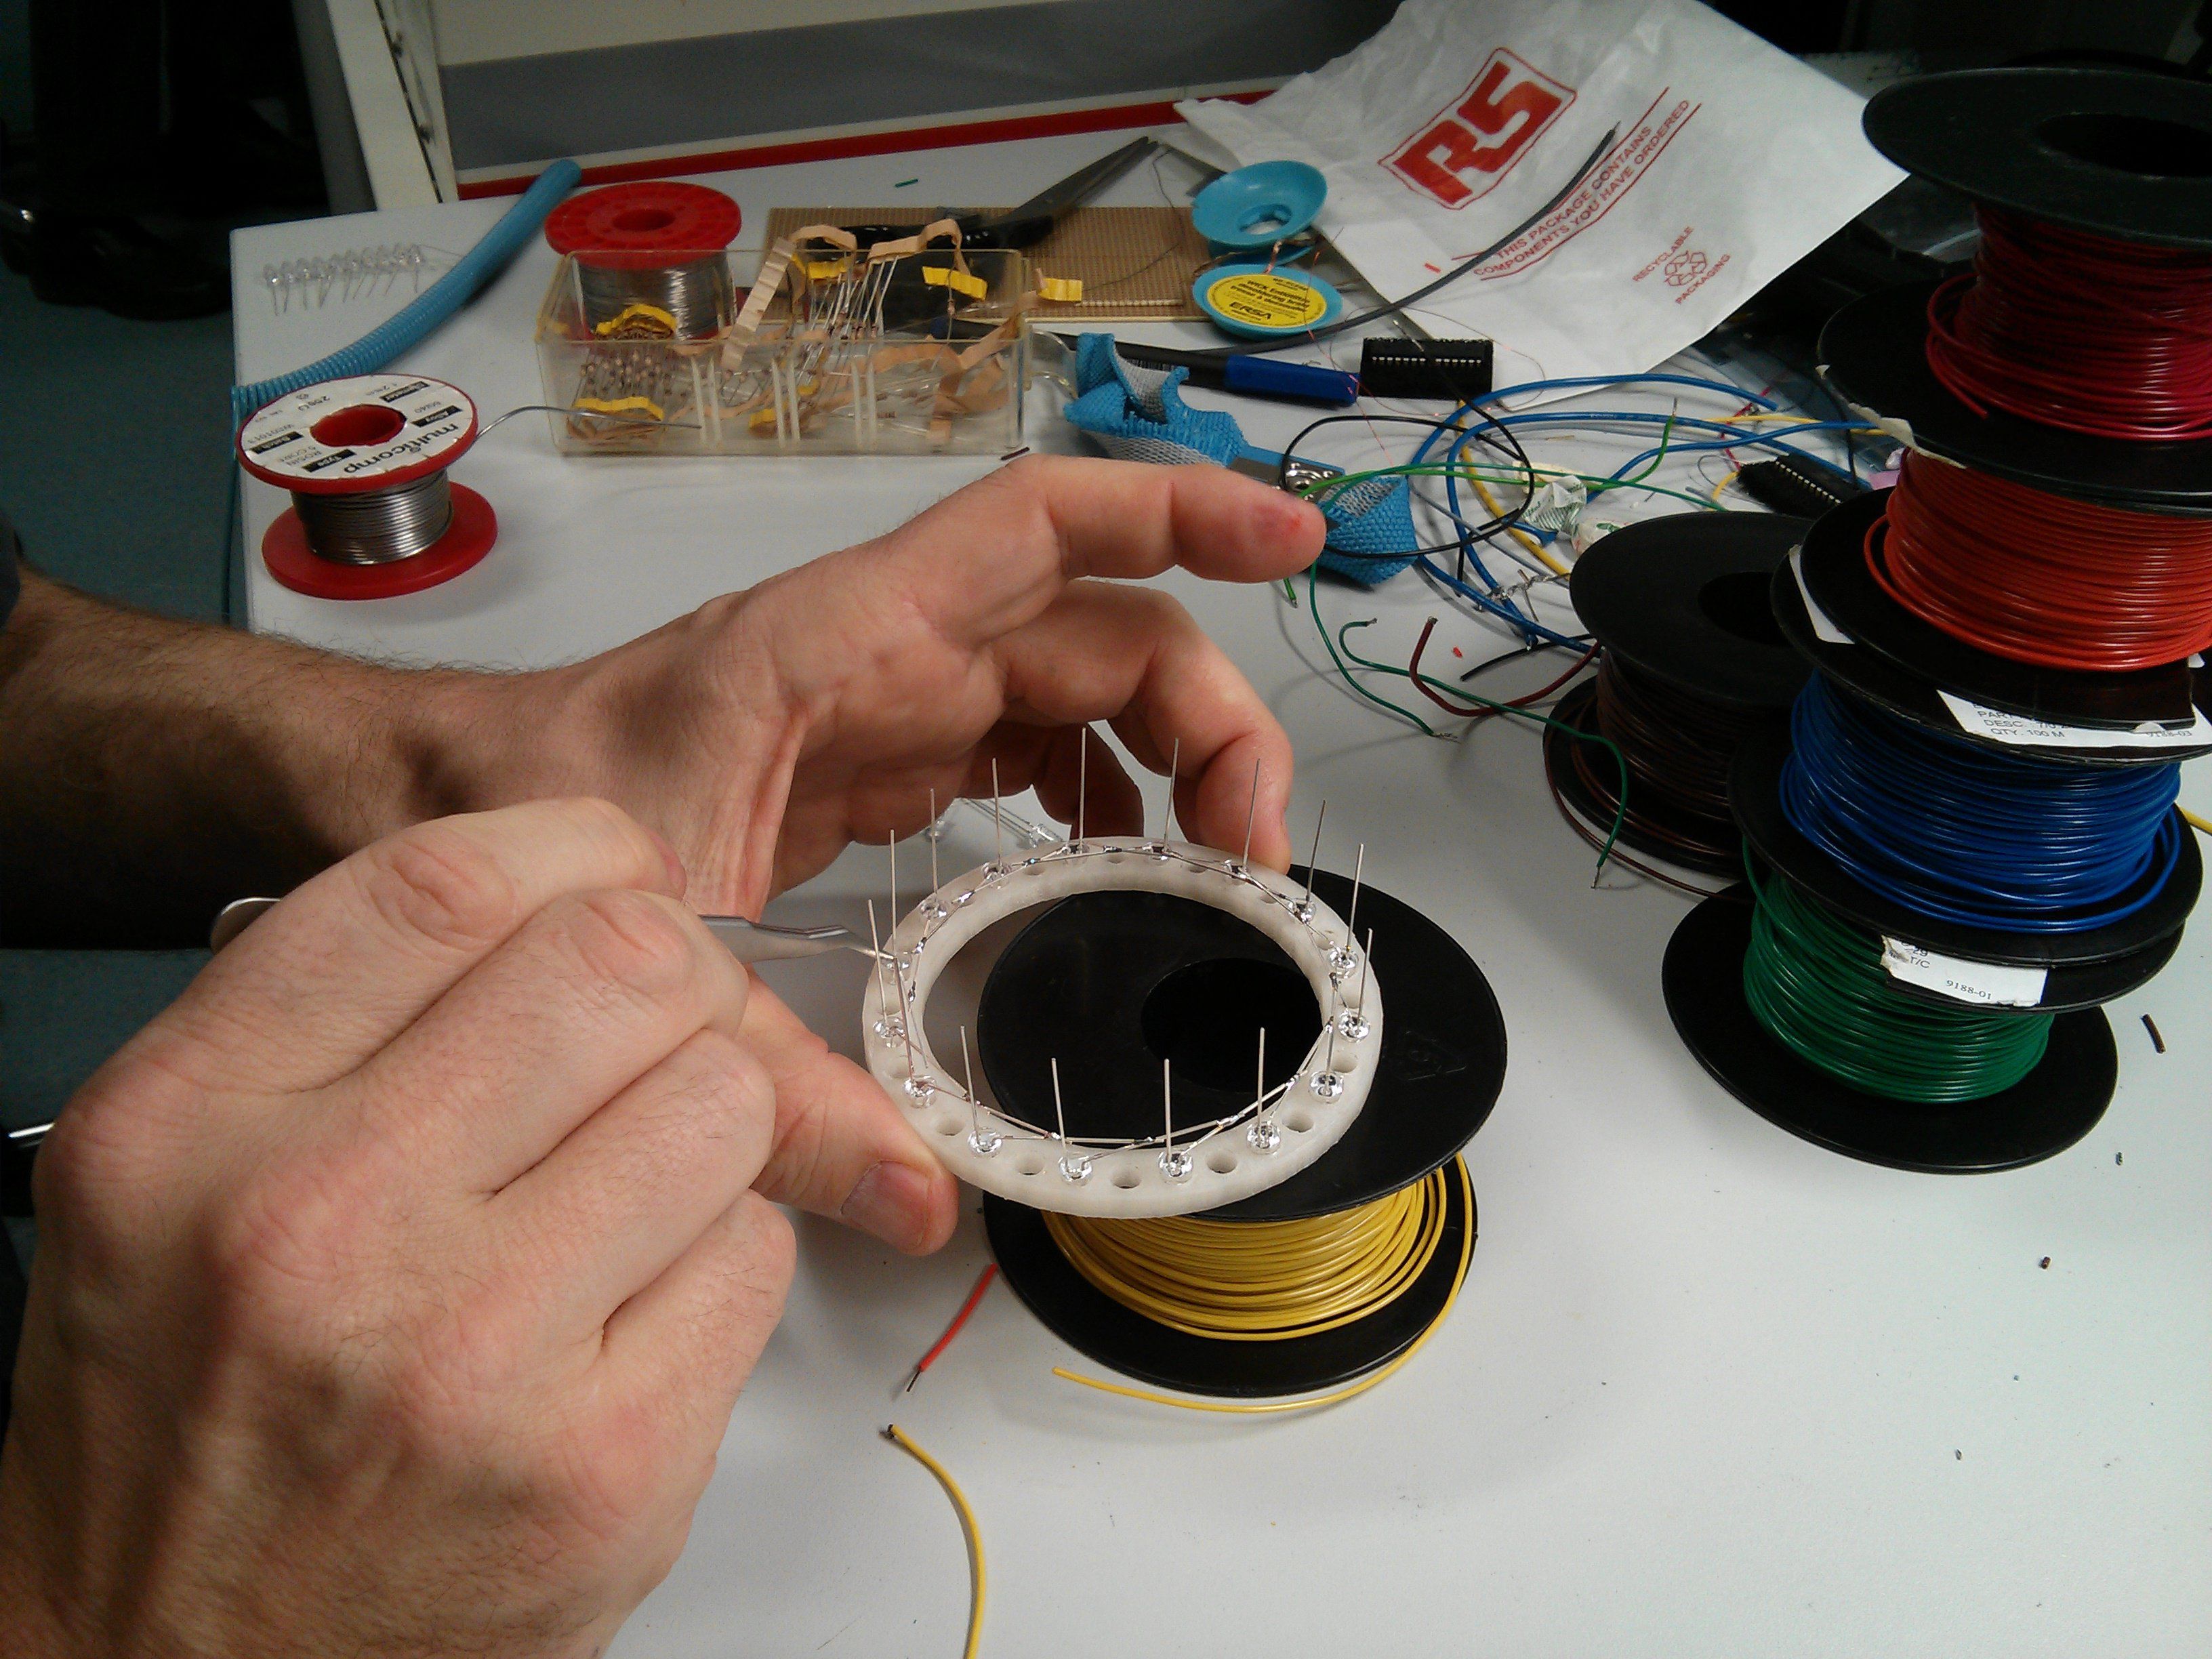
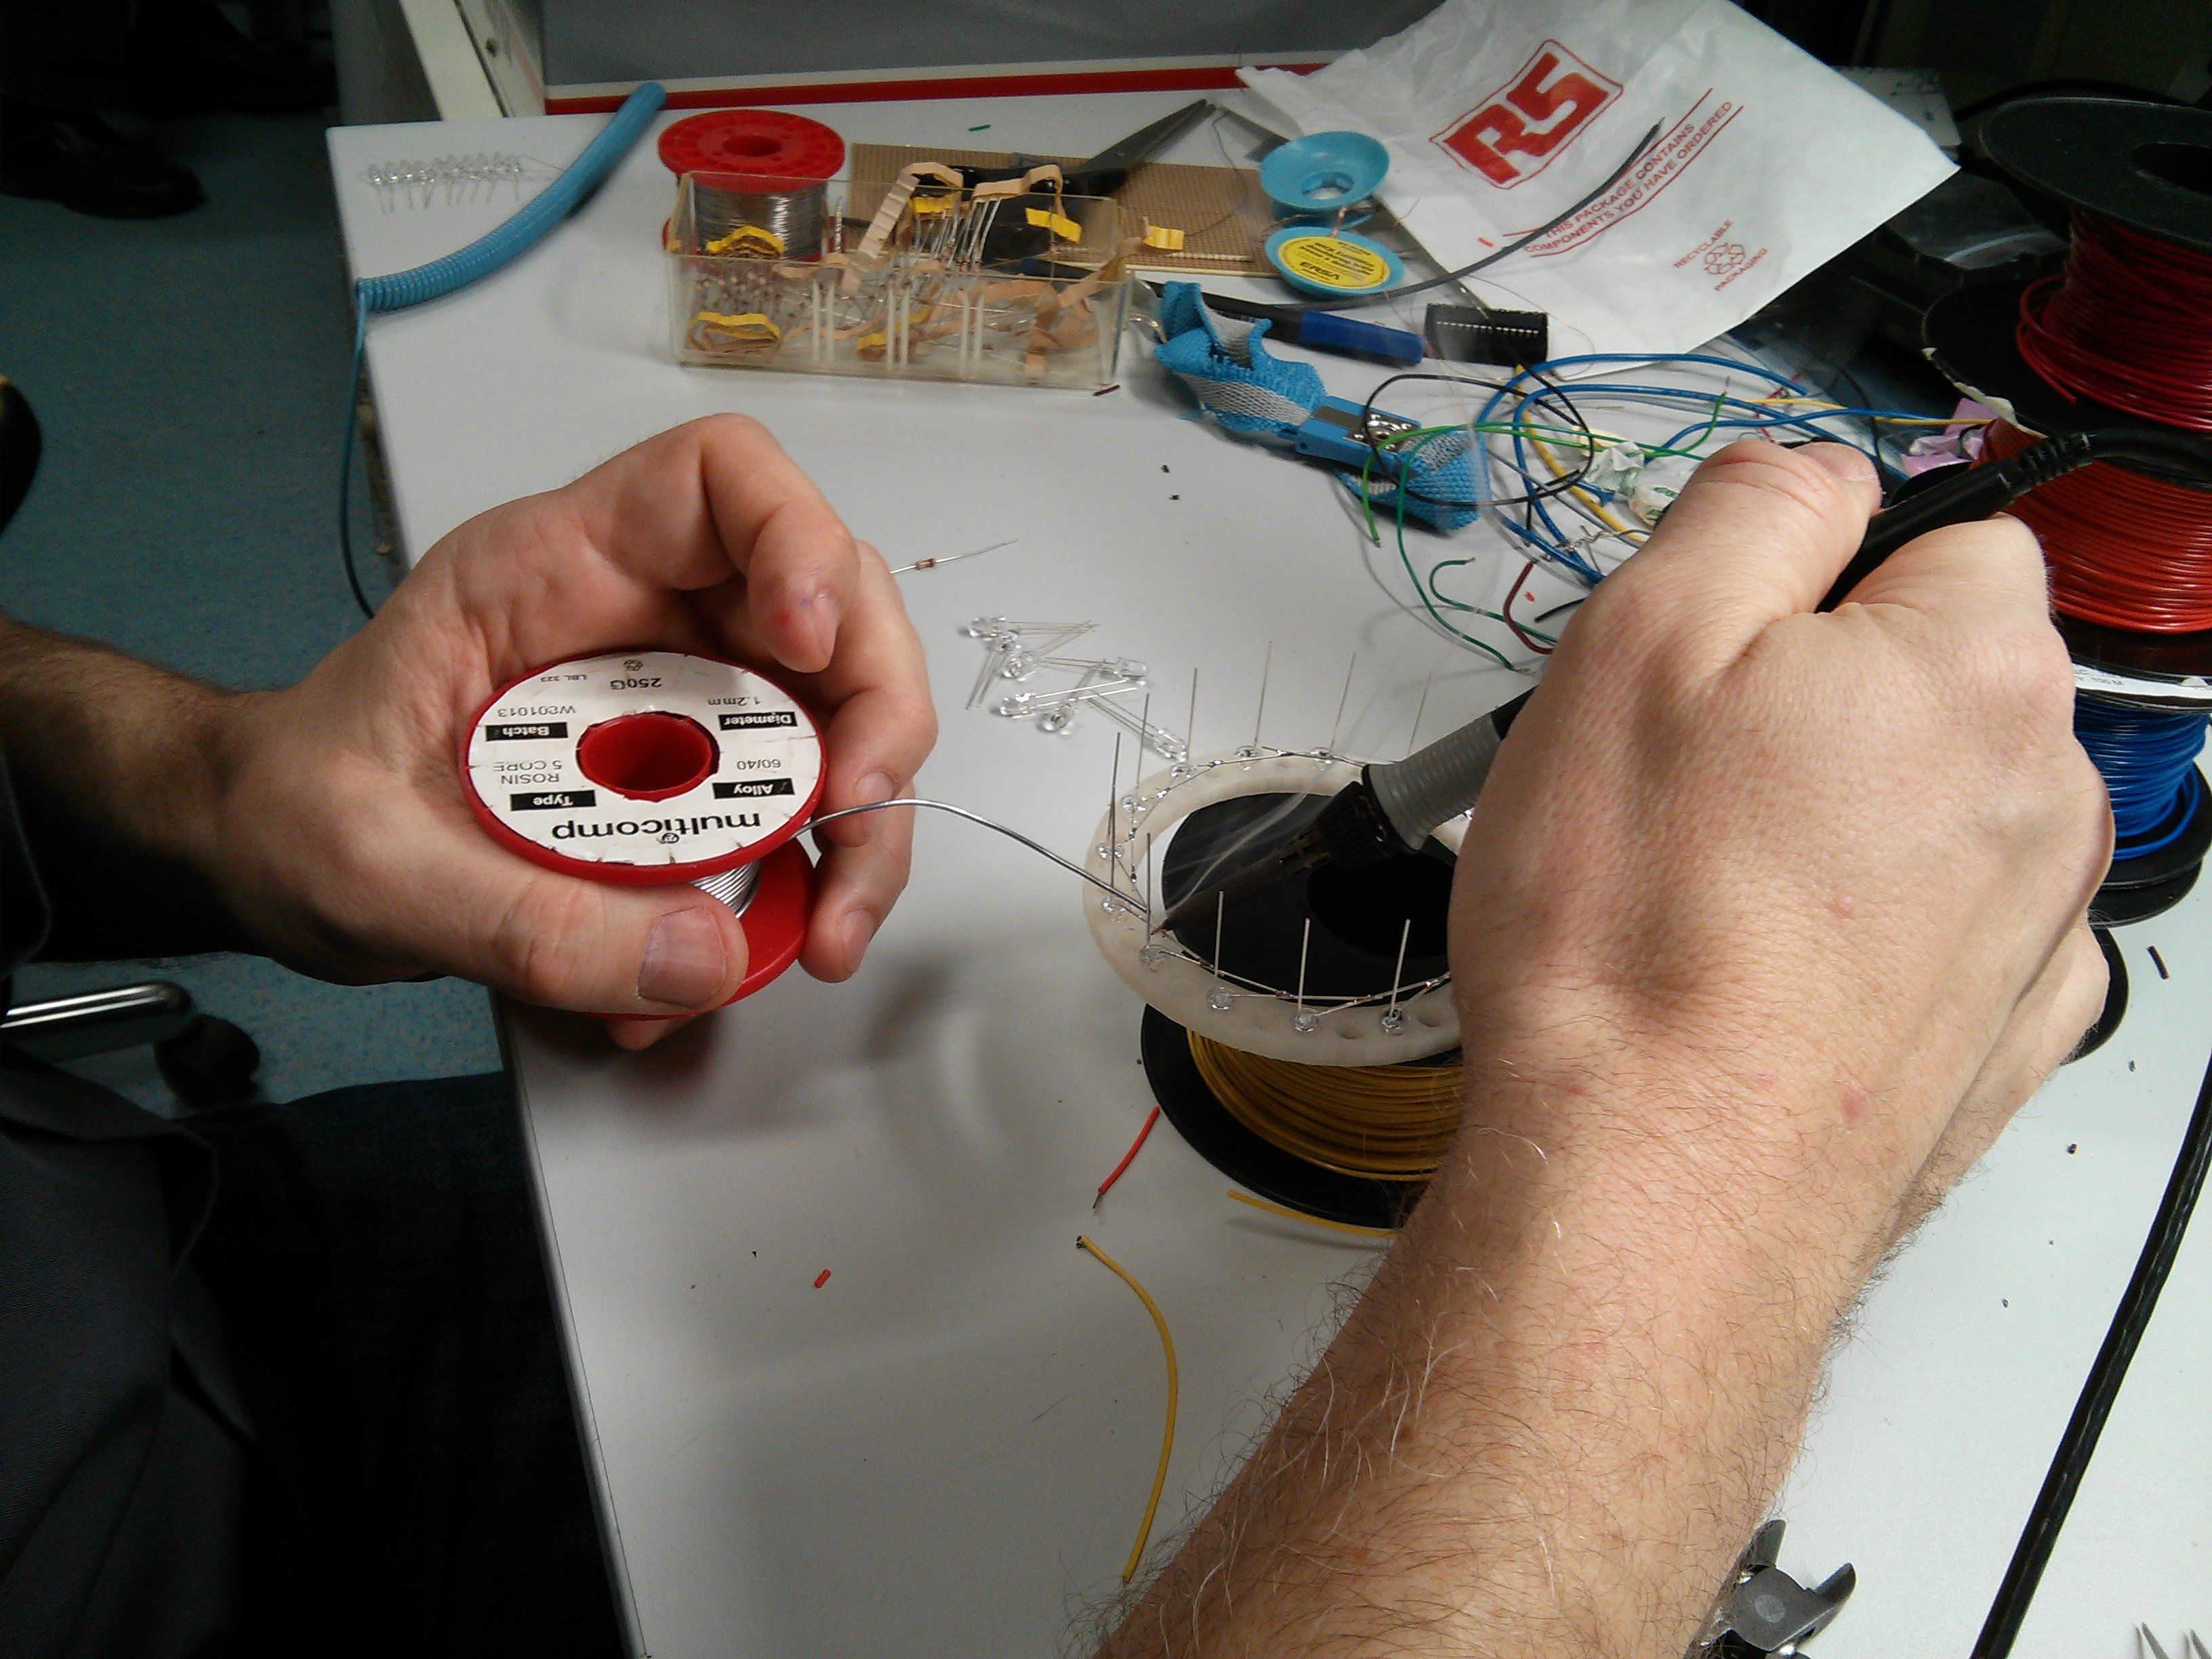
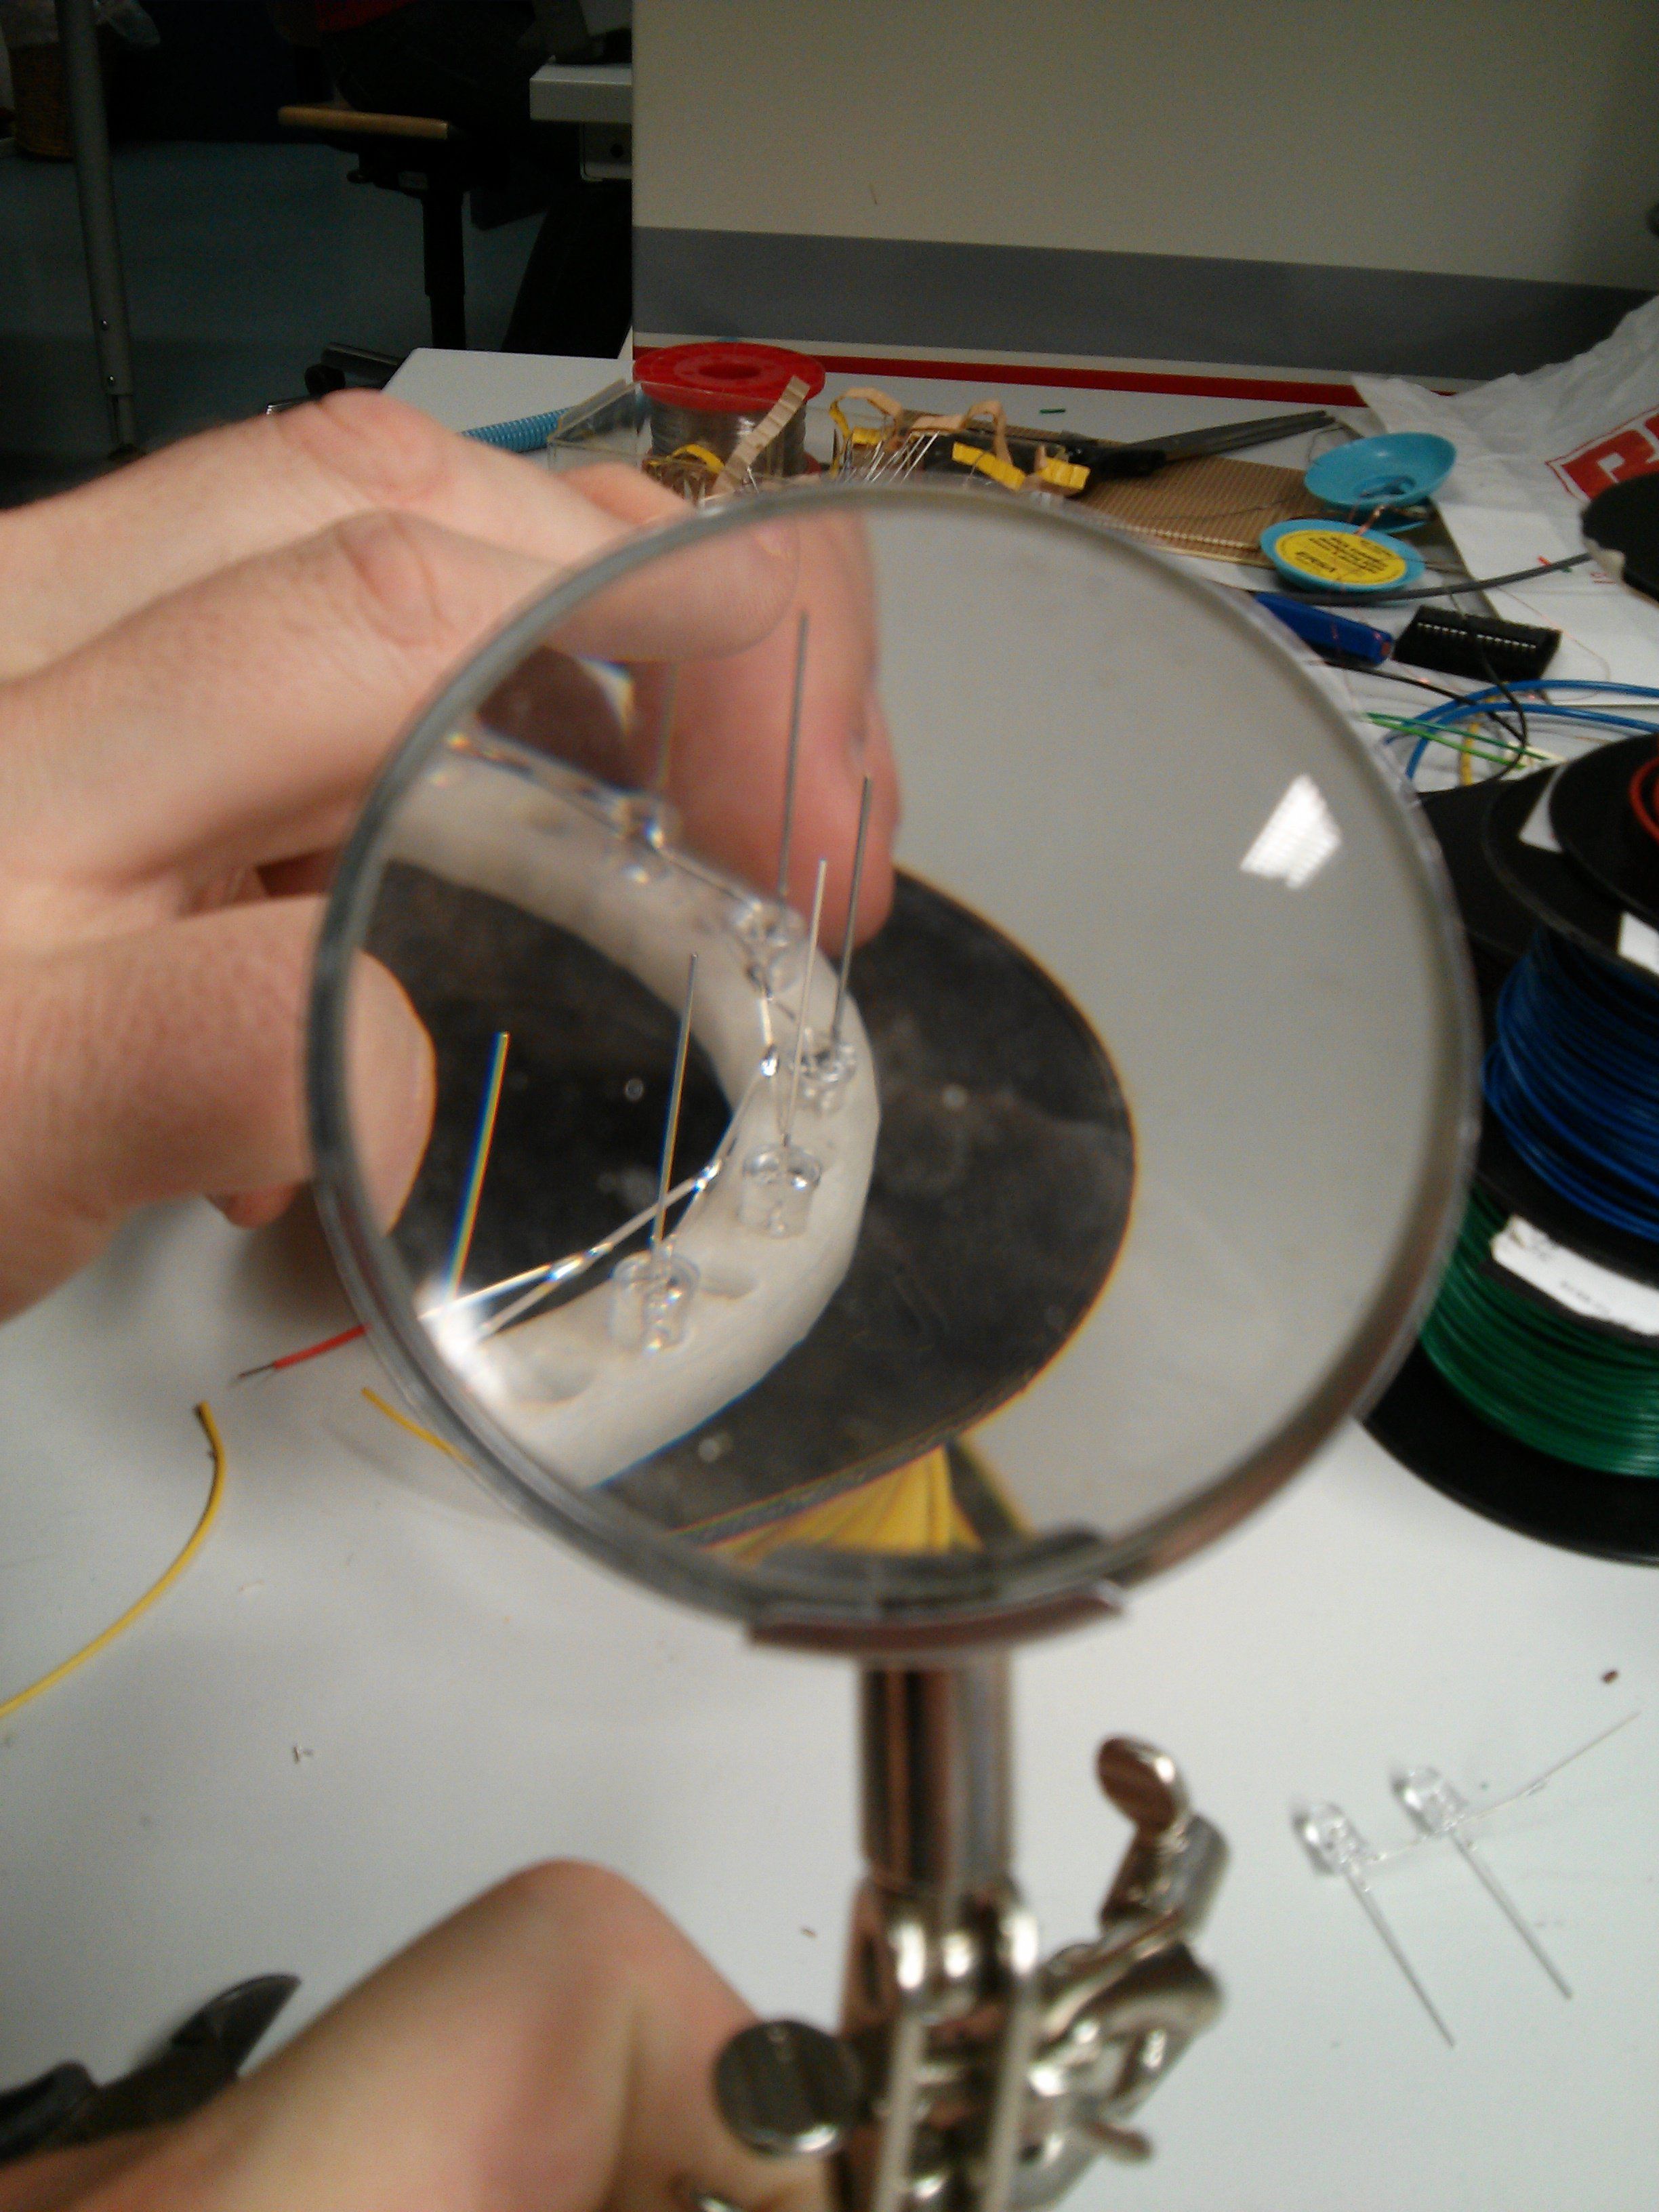
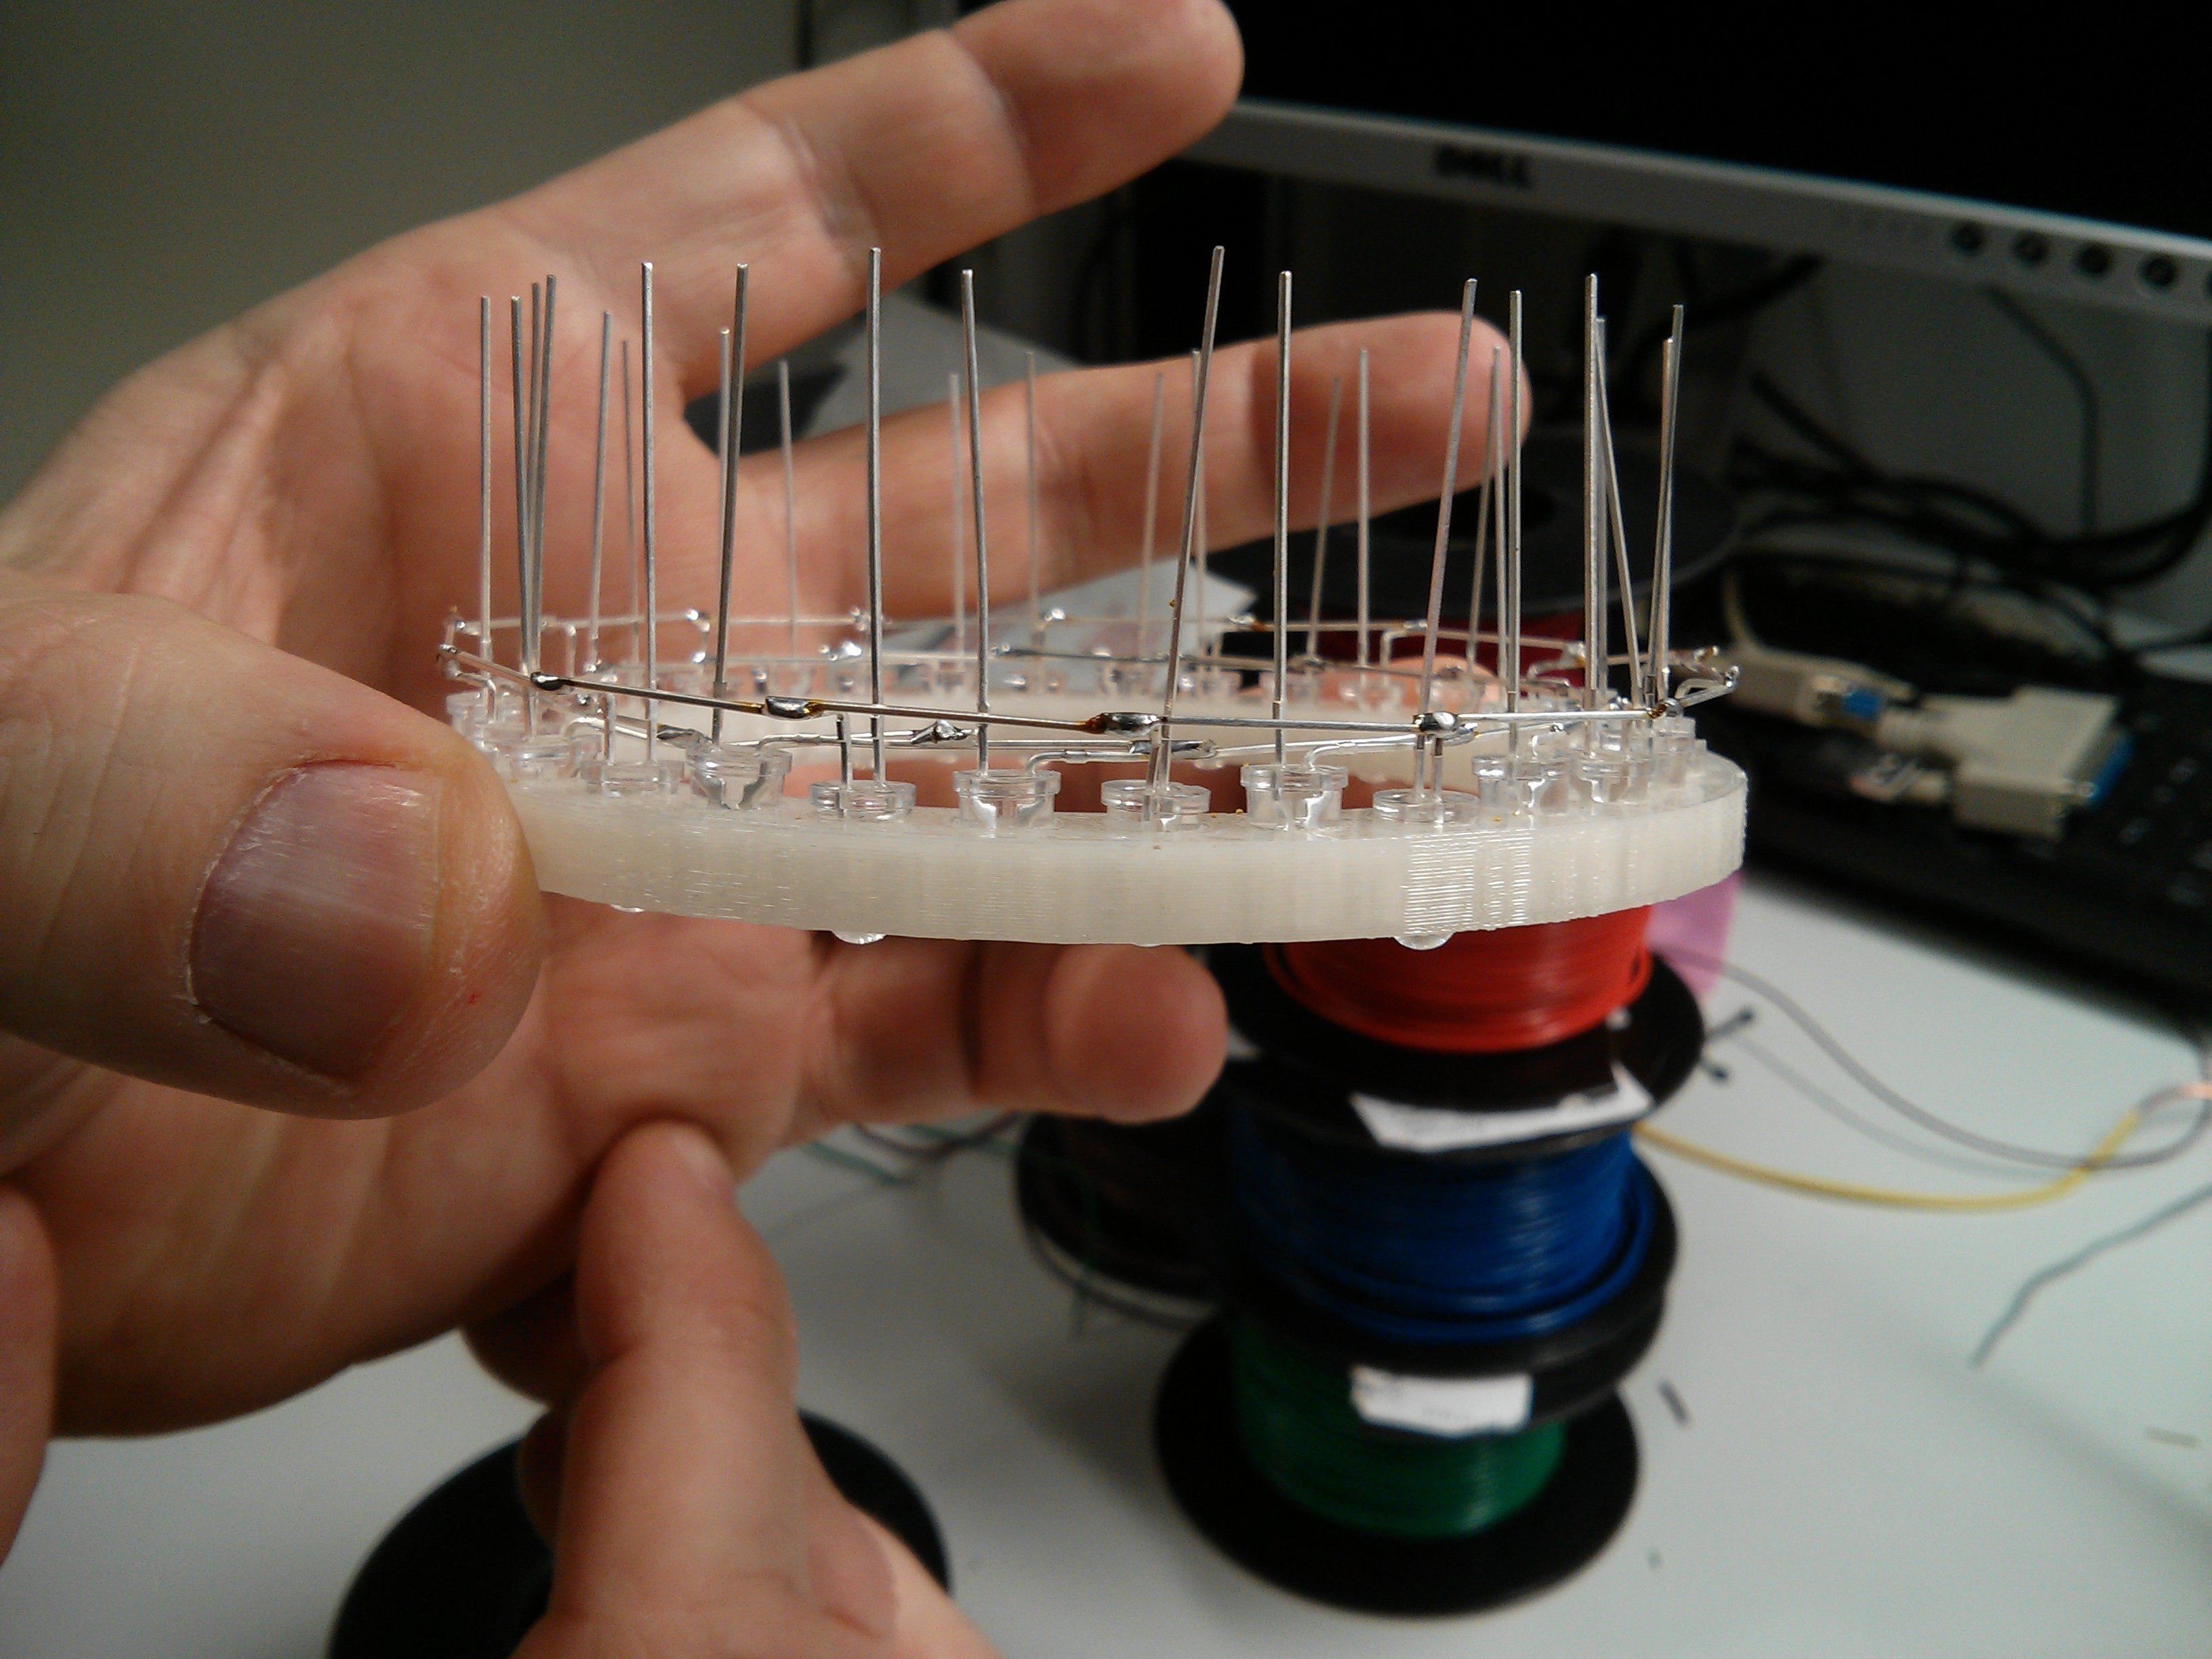
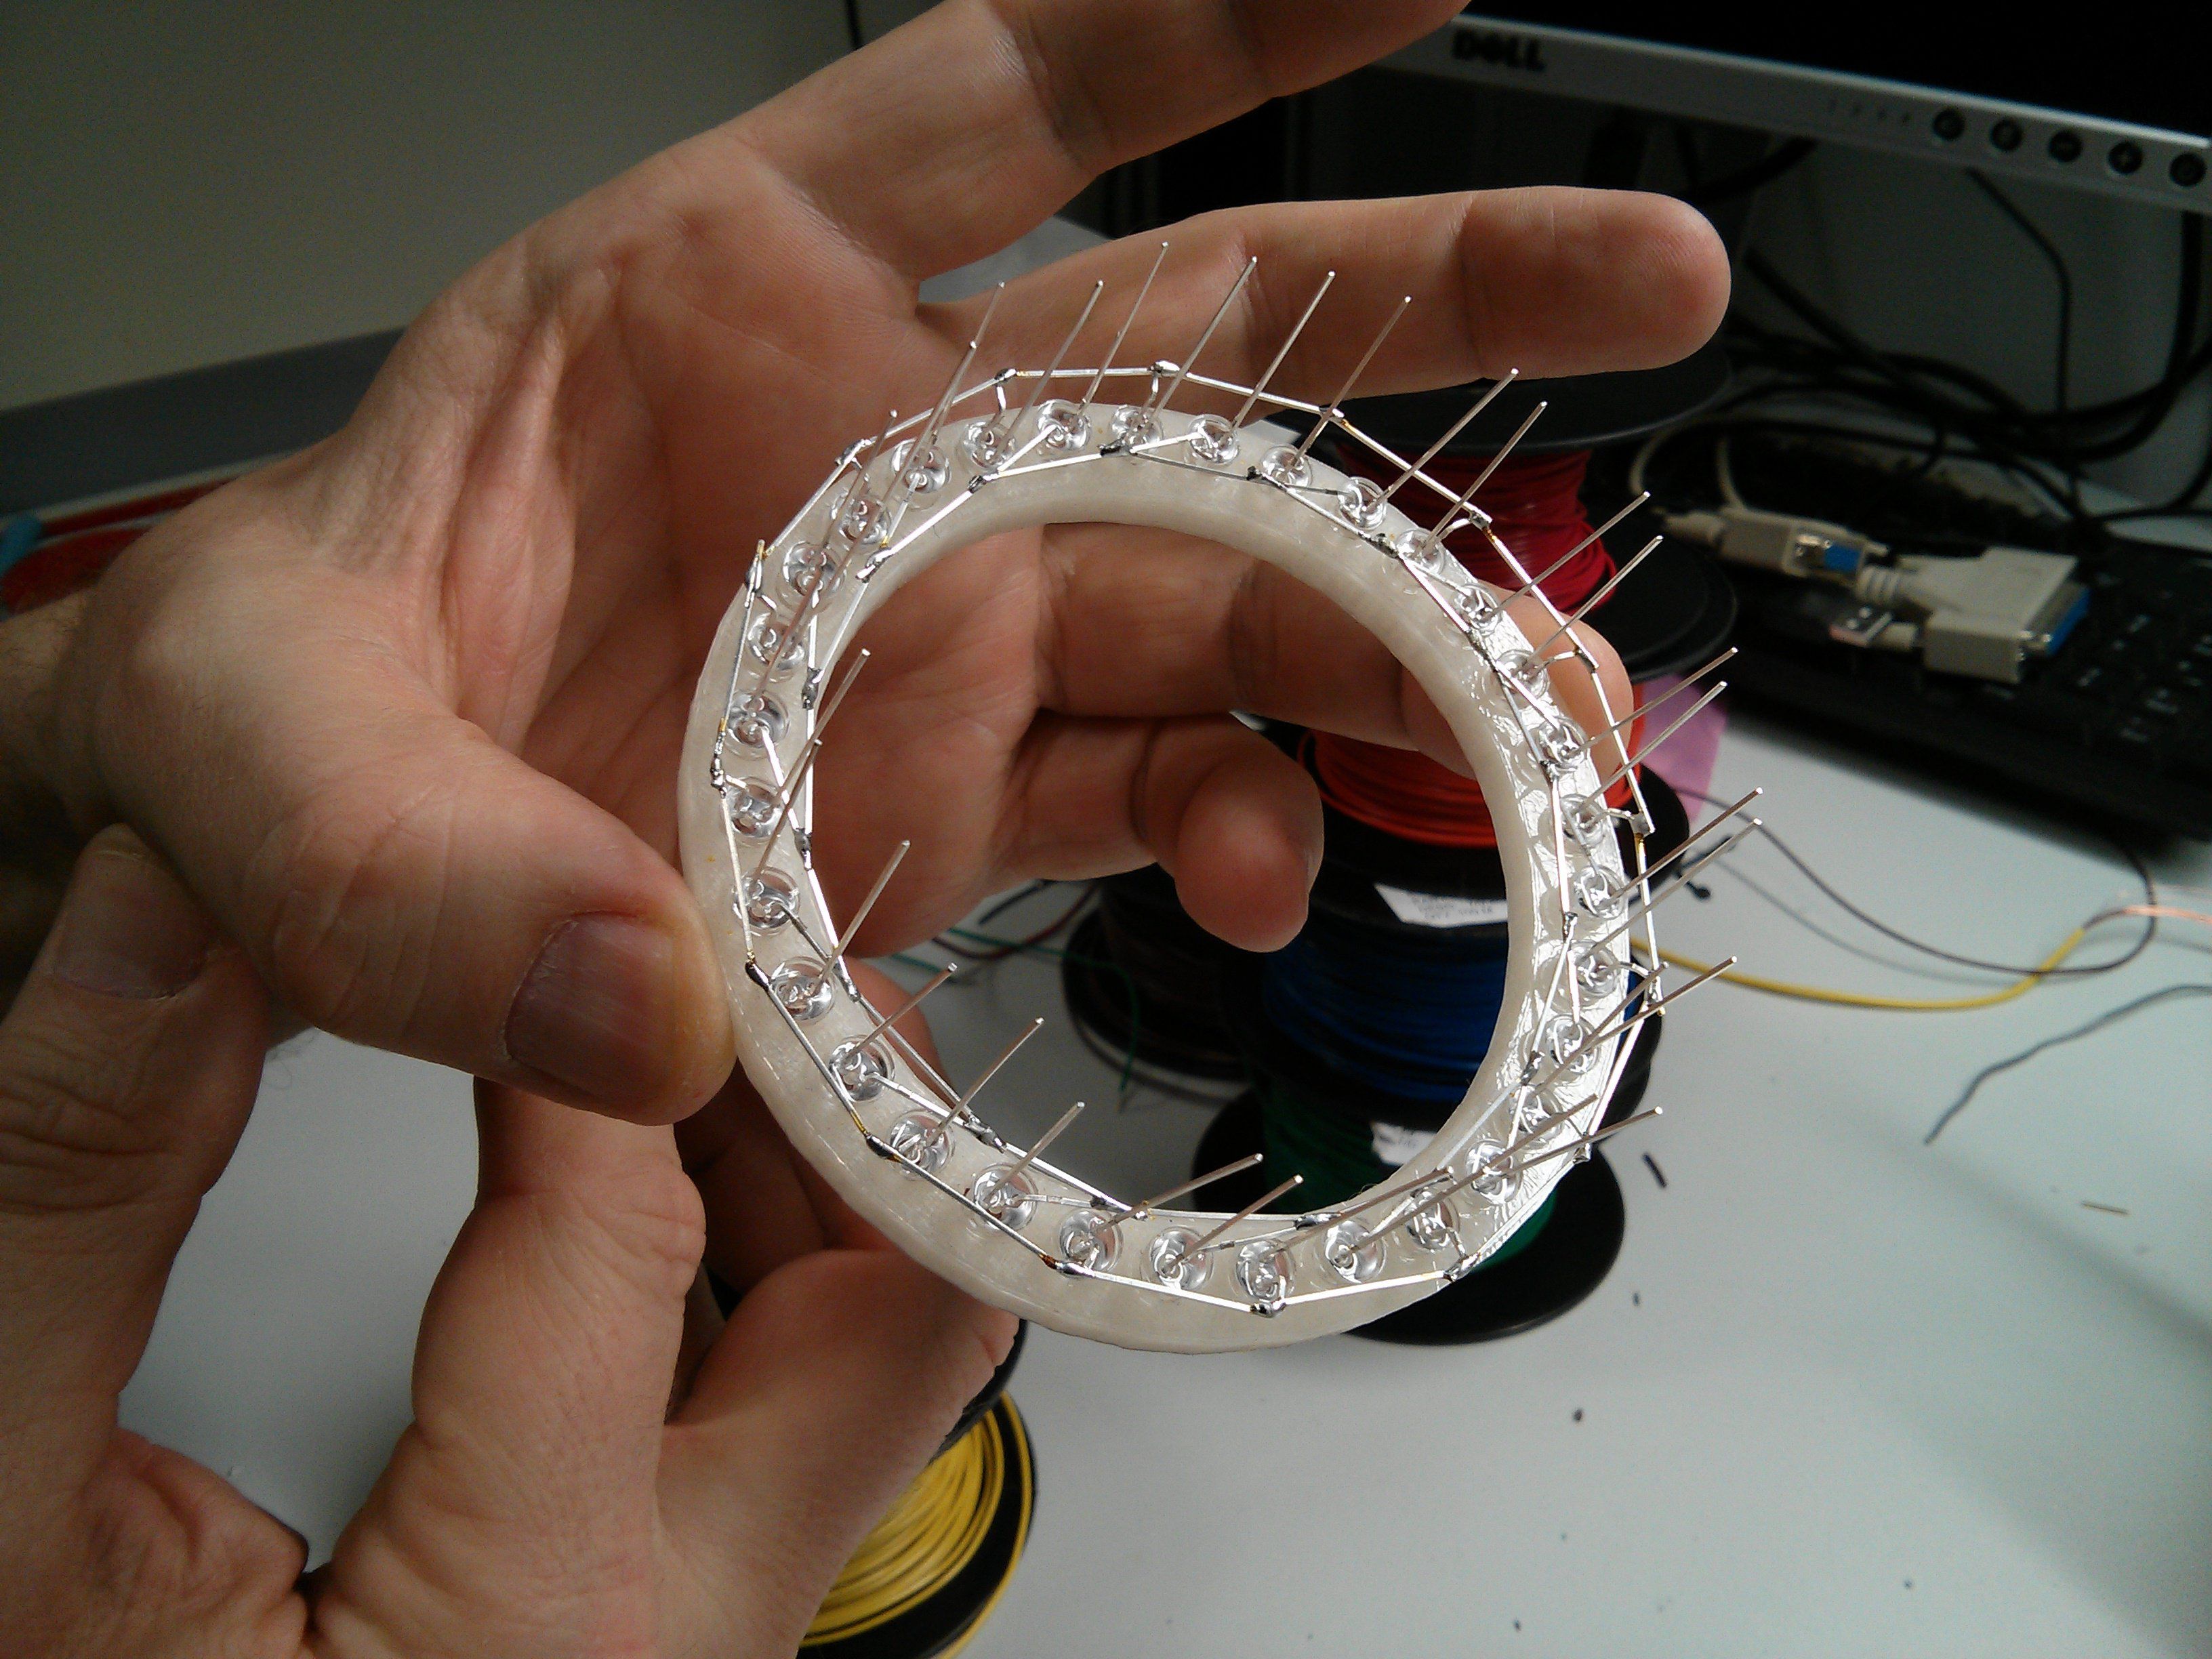
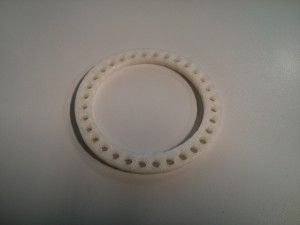
The printed ring had some issues with the holes so I had to drill them to 5 mm but i looks fine. Unfortunately I hadn’t think about the mounting for the LEDs and also protection of the circuit and so on. But how cares…

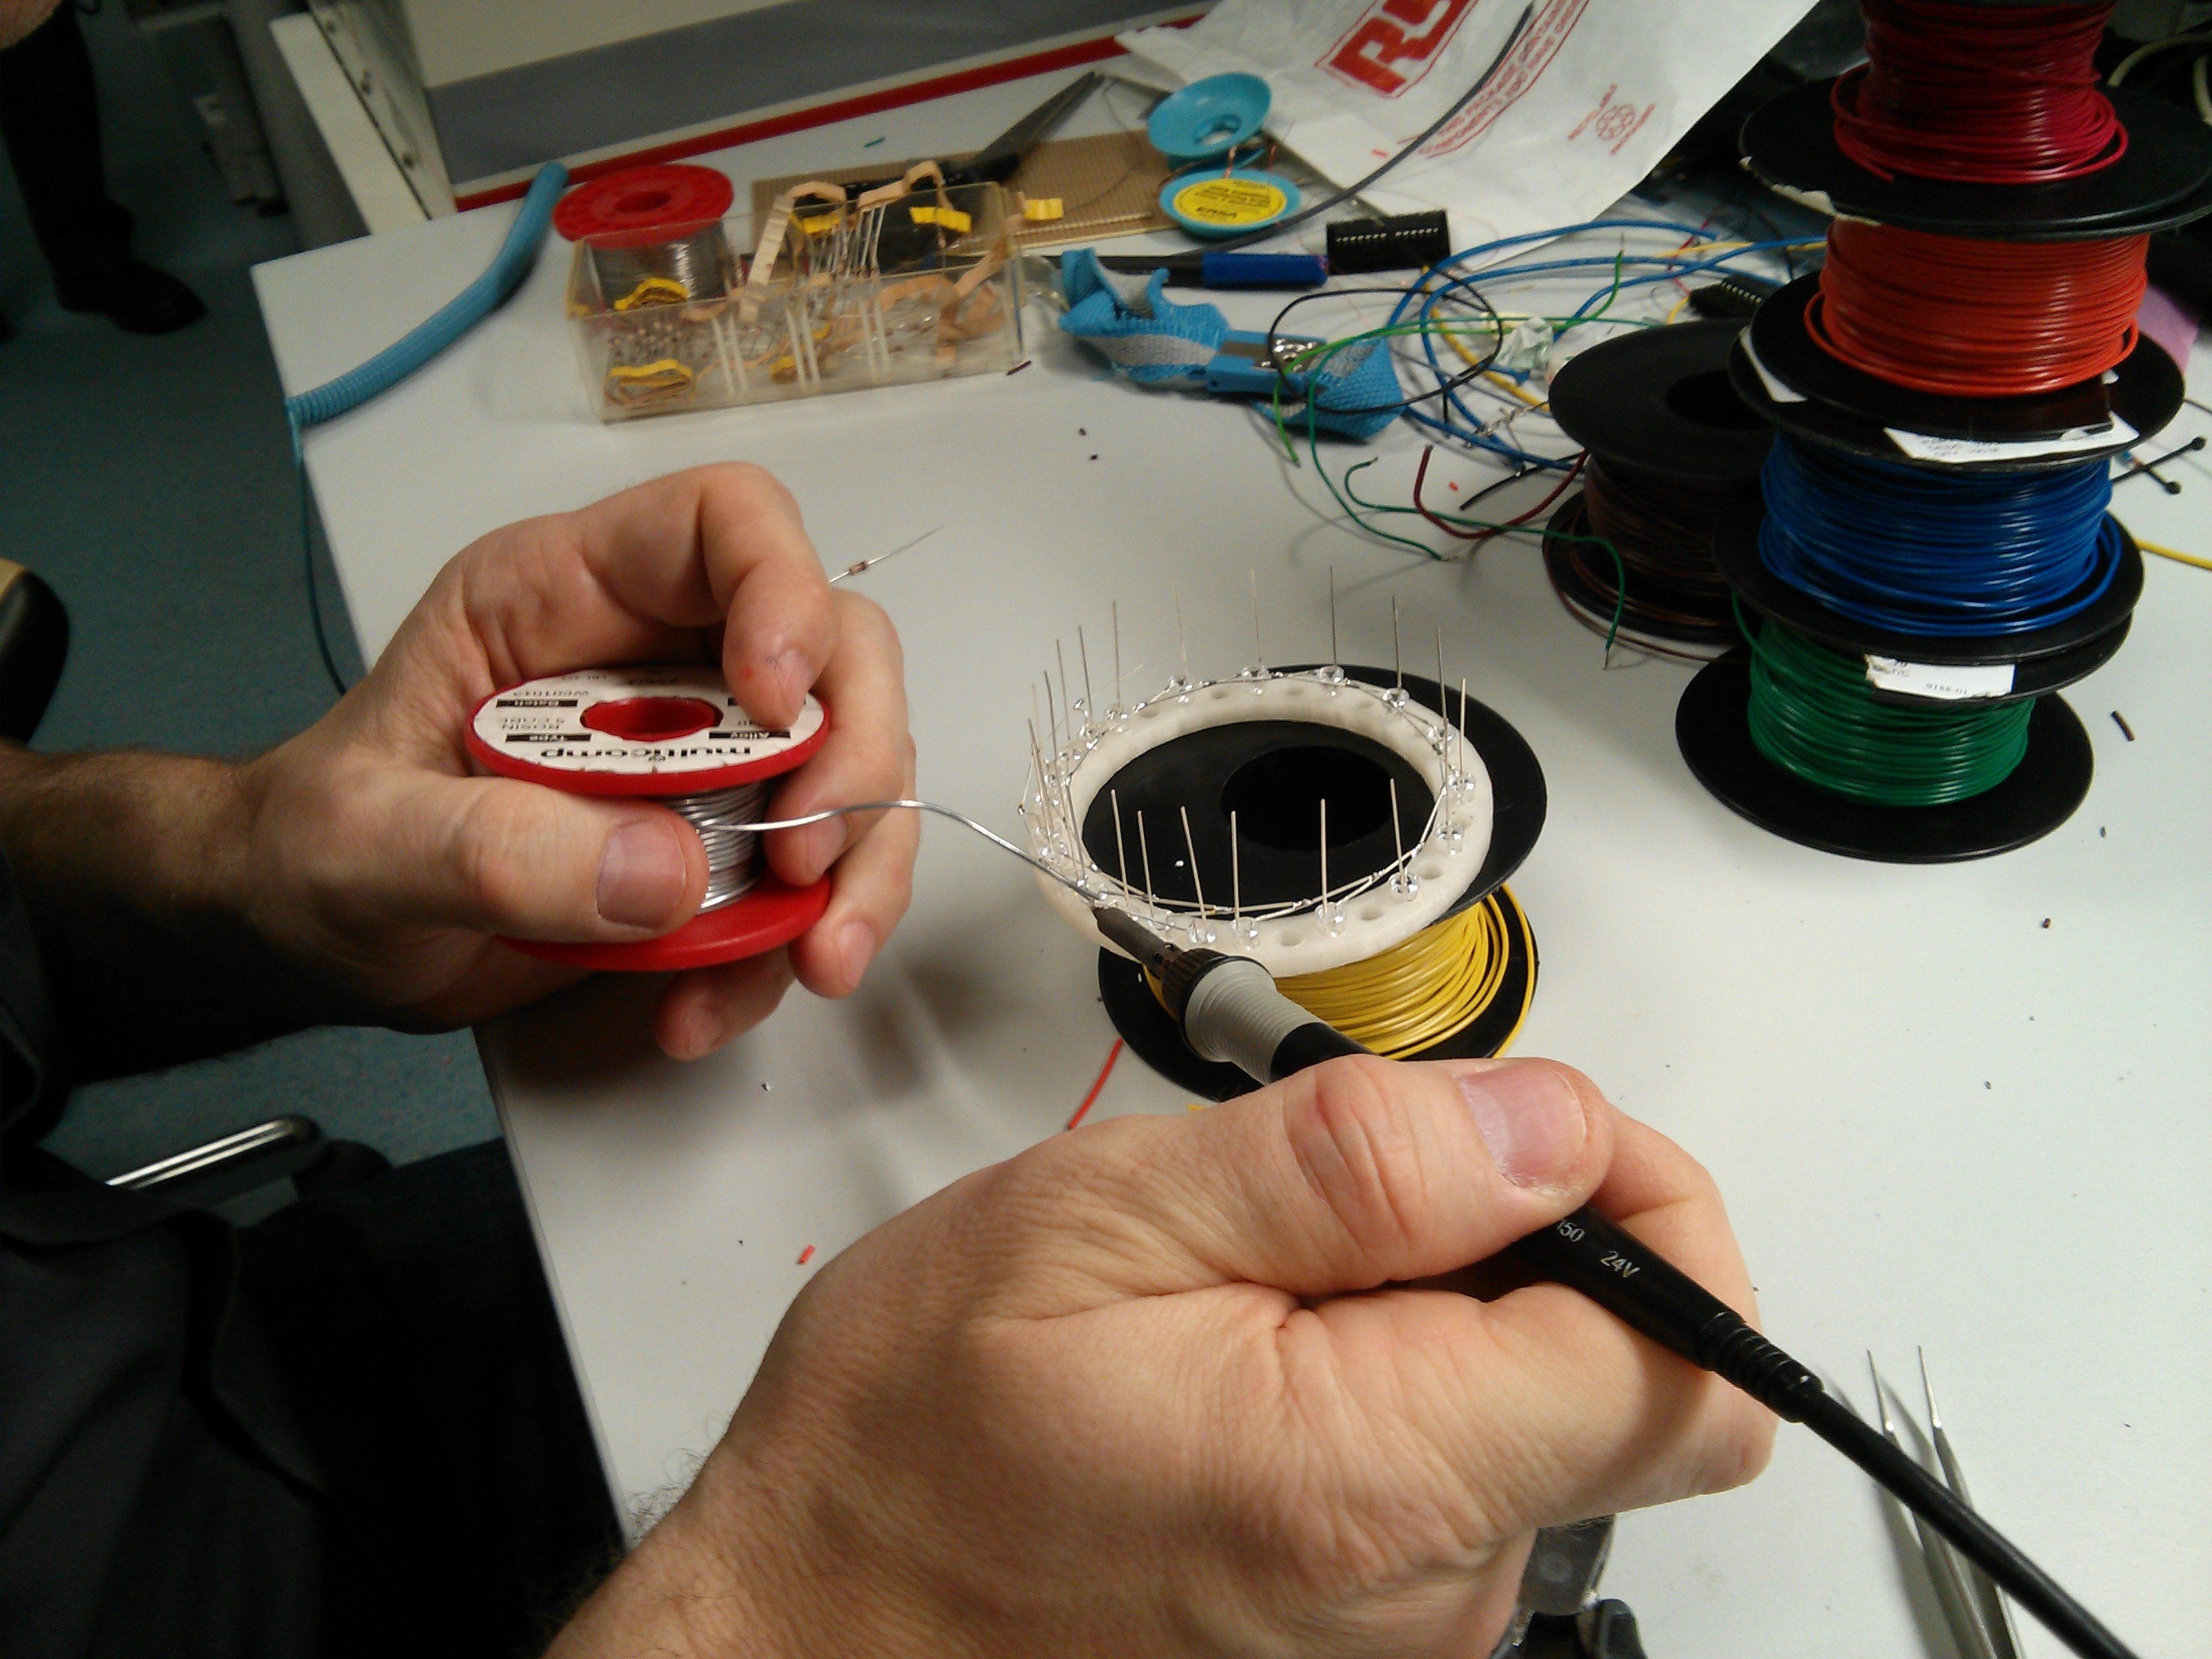
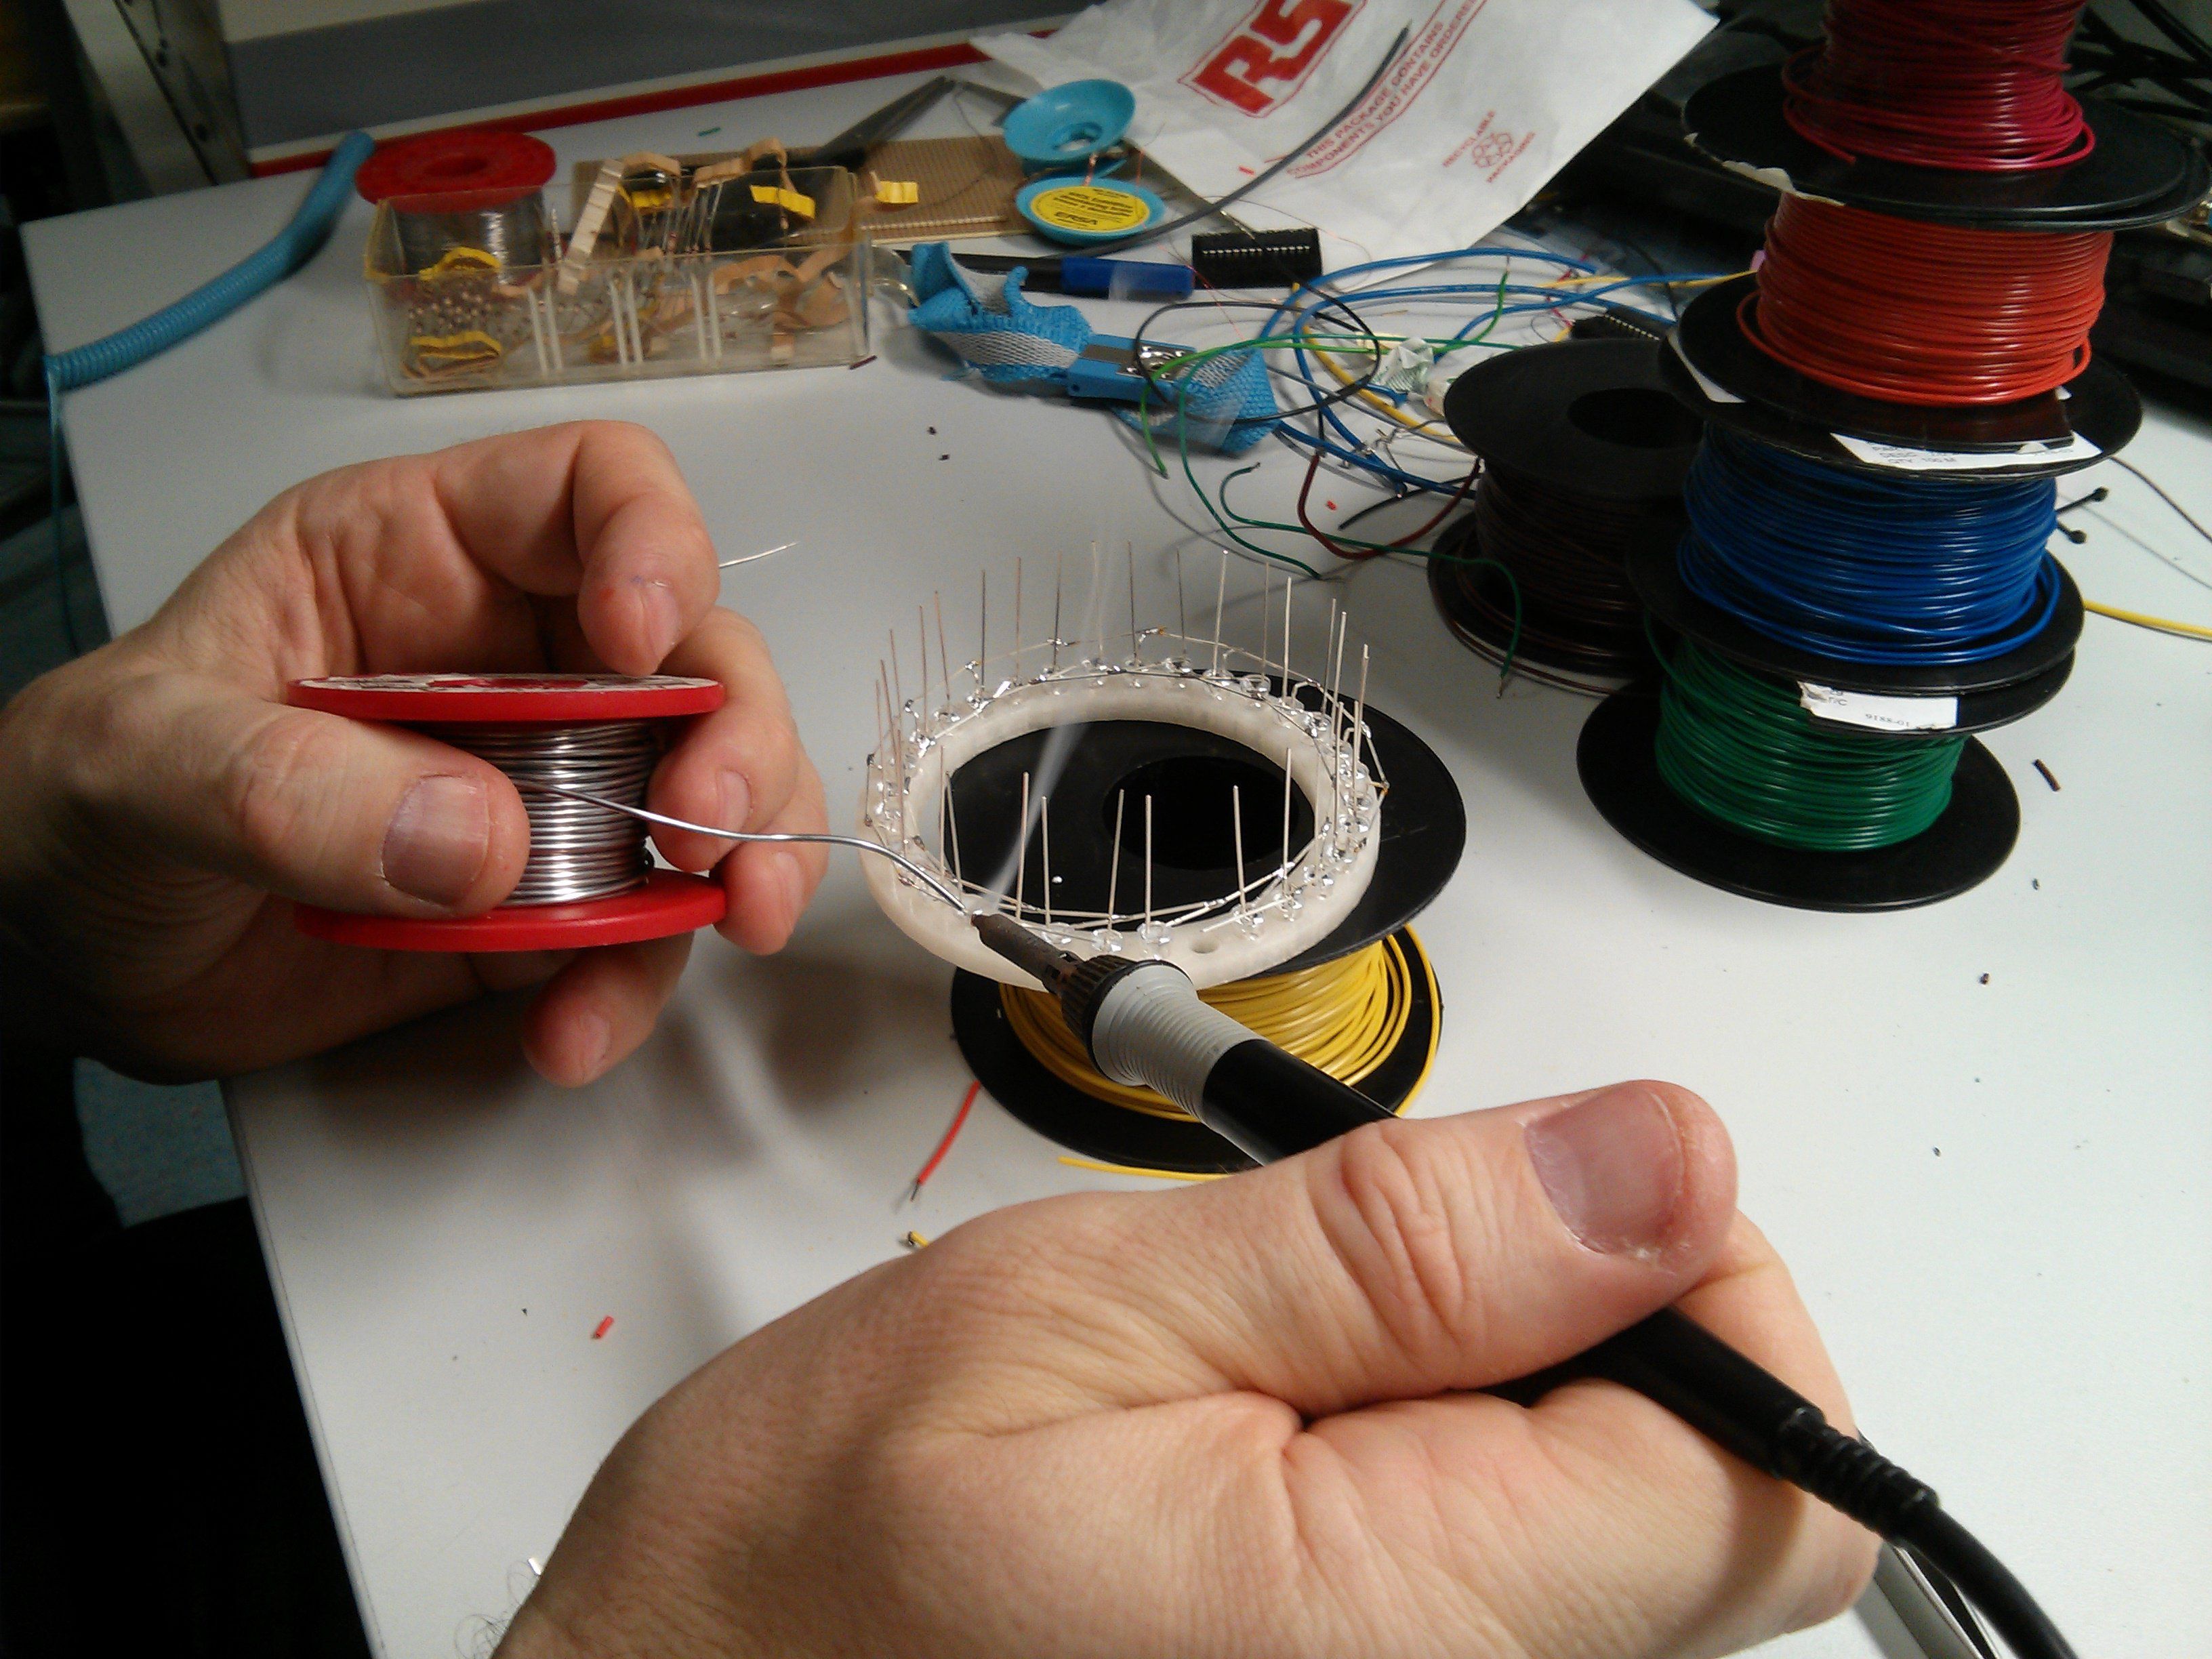
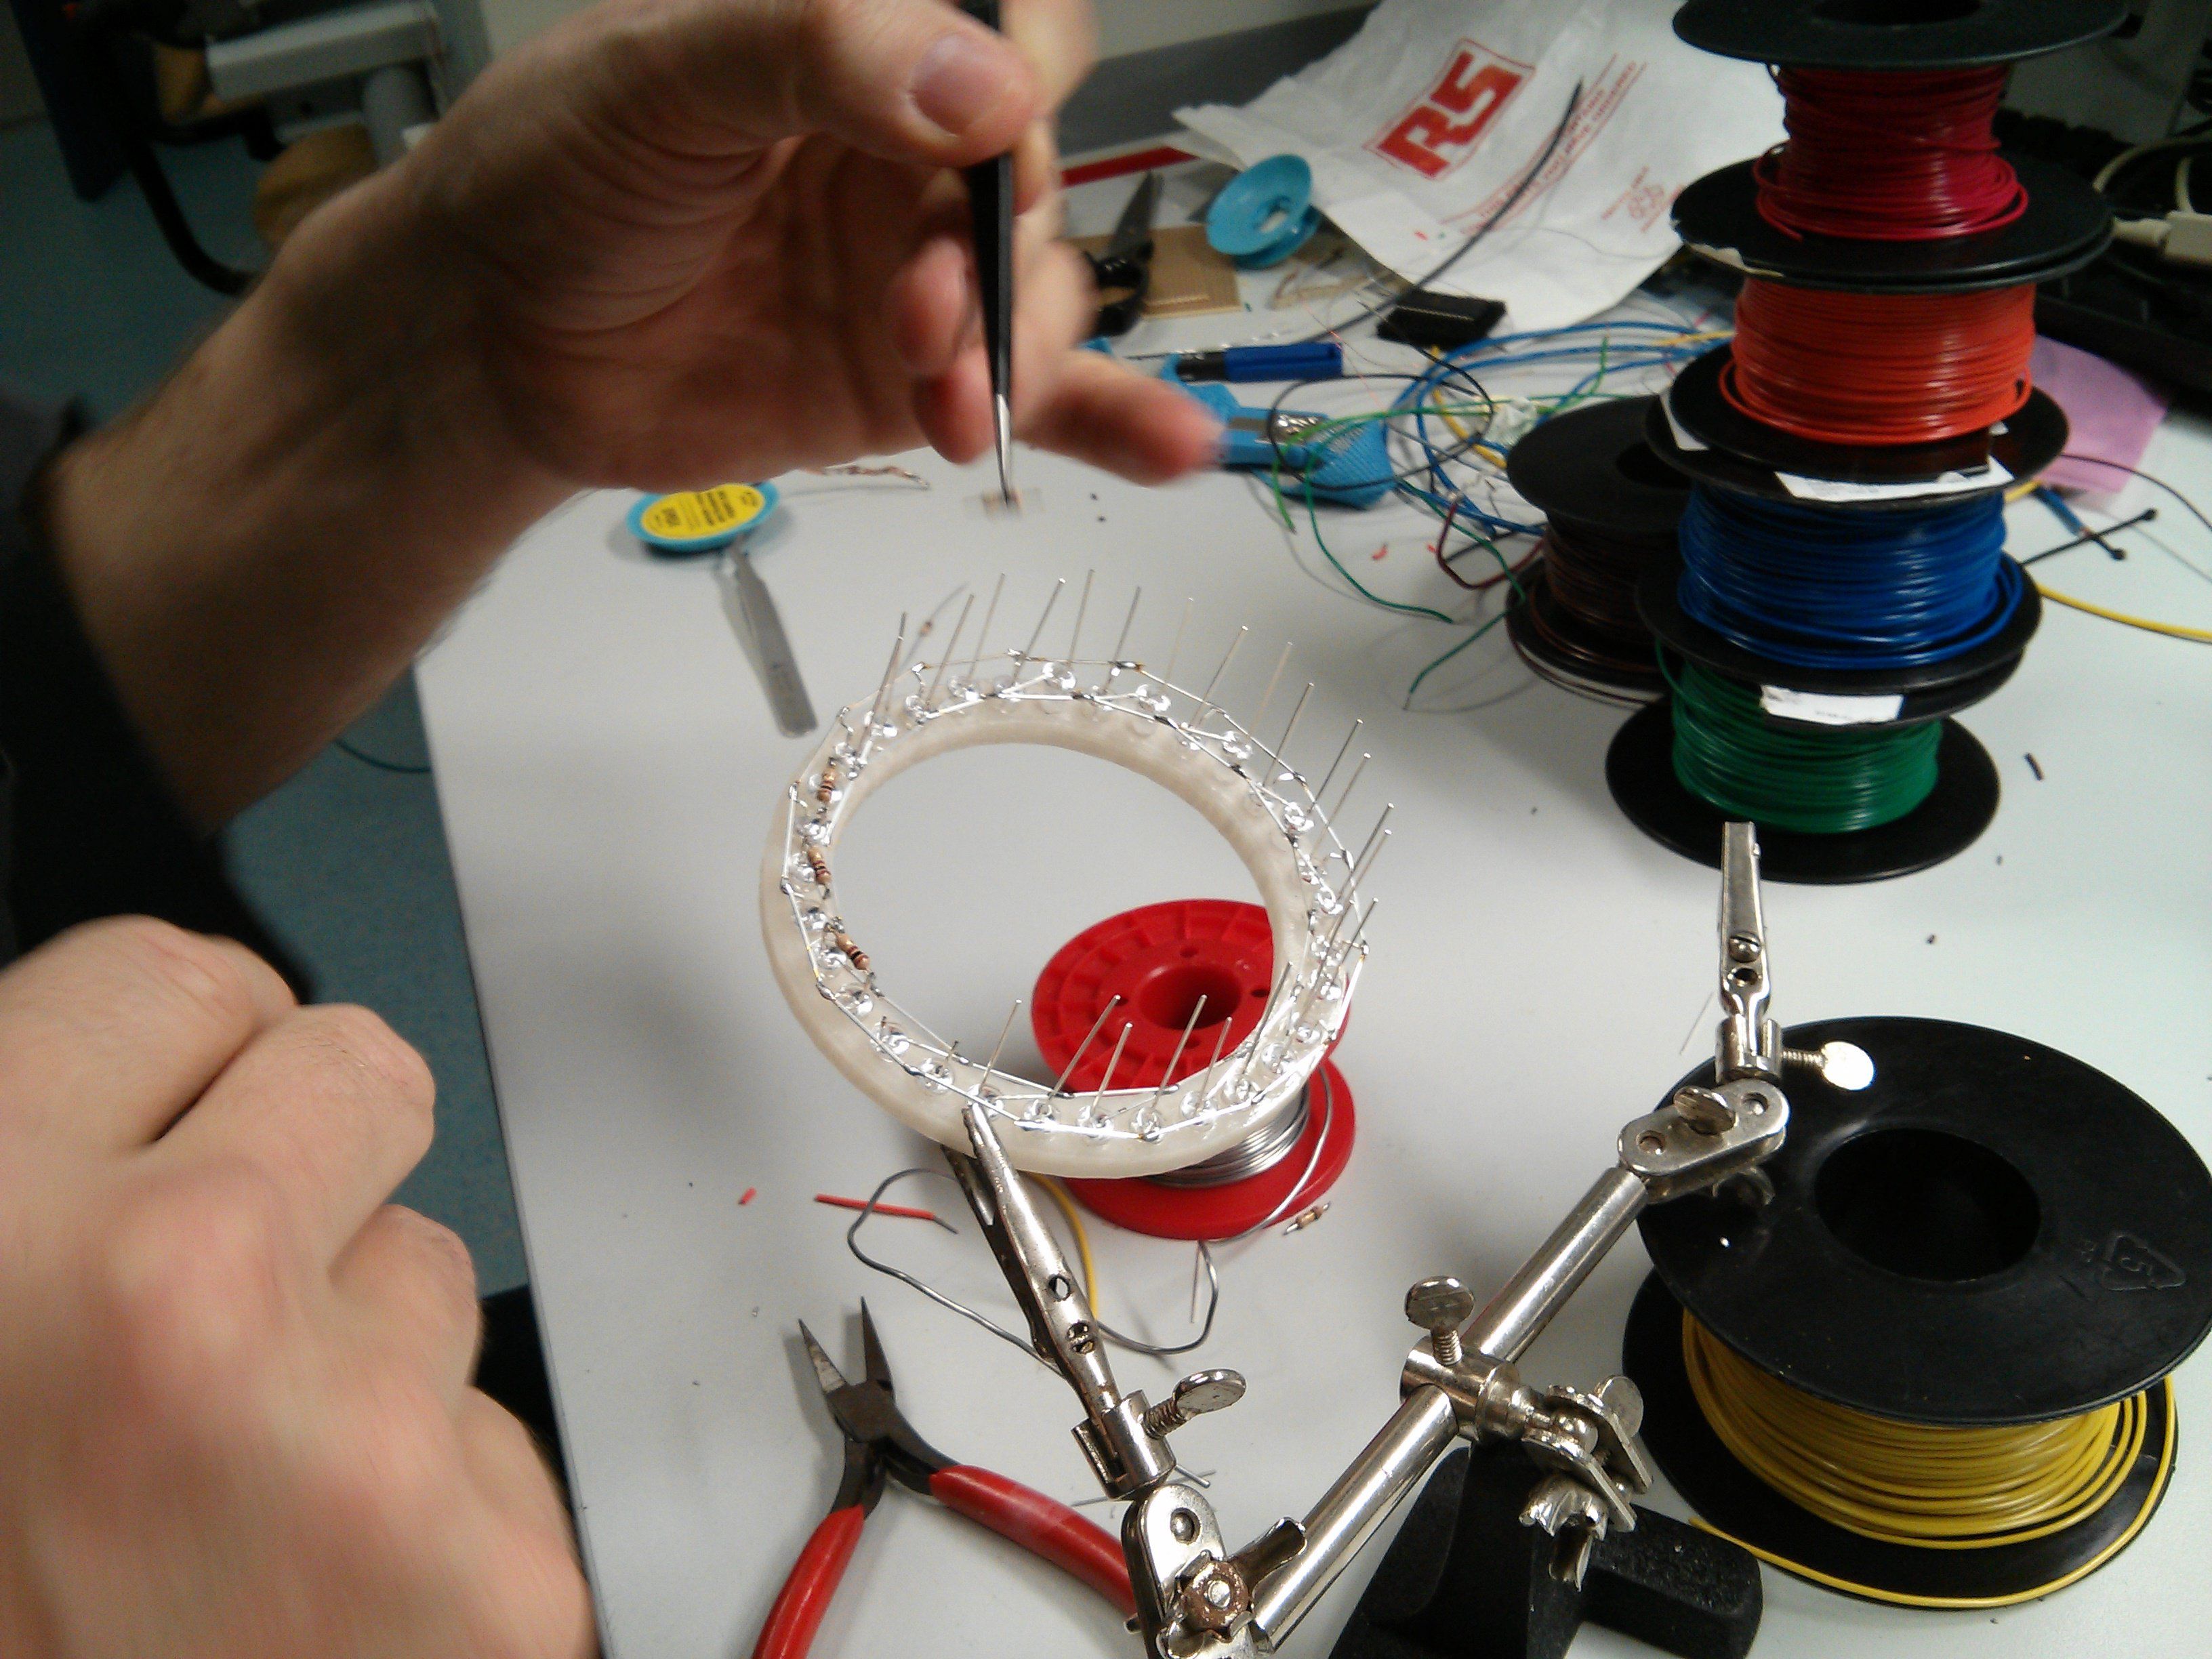
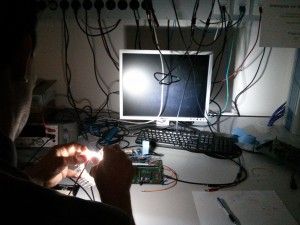
A friend of mine came up with a great idea for soldering, so that we don’t need an additionally PCB or wires. We used the leds of the LED to create an inner and an outer Ring. The inner ring is the VCC and the outer GND. Between two LEDs we soldered a resistor (100k Ohms) as series resistance. But take a look for yourself… 🙂

Sadly i didn’t take a picture of the full ring working so here is a picture with 10 active LEDs, quite bright. But I wasn’t satisfied with the result so I imitatively start to think about V2…

To be continued…

LED Ring – Part 1

As I just write, I just got a macro extension tube. Every time I ran into the same problem: i had not enough light… so i checked some websites to buy a LED-ring like this. Unfortunate some people say that these devices have not enough power… so is decided to build my own LED ring so that i will ever have enough light.

Luckily we just bought a 3D printer at work and I am in charge to get familiar with this device. The printer we are using is a Felix 2.0. Is a very easy and i think well priced device for the most applications. Also the community of the printer provide upgrades and the distributor, Felix-Printers, provide upgrade kits if a new version is rolled out. We had a few prints before, but mostly for Students and colleagues. We had a few problems with the feed of the filament so we came up with the idea to build a holder for the rolls. First we bought some rack mounts from a local store an mount them on the wall.

On the picture u can also see the second step, the holder for the ball-bearing. We found a quick solution for CAT drawings here. Autodesk 123D is a free drawing tool for every System, because it will run in the browser window. We designed the holders and print them with our printer.

As the next step we step we used ball-bearings to pivot the filament roll. For this we came up with a normal staff of aluminum. At the ends we mounted the ball-bearings. 

The final result is nice to look:

The CAD File can be found here.

To be Continued….

take a picture of you eye… not that easy

IMG_9587

Today i found a great picture of a eye in the WWW… and i think to myself, ok let’s try this out. I played around with some settings and end up with the standard combination of the EF-S 18-55 and the EF12. But i have some troubles with the light and it was very hard to not move the eye when the shutter clicks… damn evolution!  I take around 50 pictures and this is the best one… :/ not that clear, not that in focus.

IMG_20140117_102836

The main Problem is the light. So if i can get an LED ring I will try that again. Maybe i can get a 25 mm ring for my Sigma 50mm/1.4. That my can solve also some of the troubles about shutter speed and eye movement. To hold my head in the right position I used a paper roll… Here a picture of the “setup” 🙂

Longer Stars Time-Lapse

I had a chance to record a longer time lapse at the Hohe Wand near Vienna. After a short check of the weather conditions we decided to take the risk and we were successful! 🙂

We found a little field where we build up our equipment and started the timer. So this is the result:

For a final video i need truly more sequences, but i’m working on that.

Just to be complete: I used as usual my Canon EOS 600D with Magic Lantern and the standard 18-55mm IS II. No filters or other equipment was used with the camera.

Extension Tube

A friend of mine just borrowed me the his EF12 II extension tube. But today i had no time for some more shots so i just took too two in the kitchen… 🙂

It is really amazing how close you can get to the objects. Also all features of the camera are usable. I used my 18-55mm EF-S IS II and i’m really impressed what you can get for 75 €!


2014-01-11 14.49.50

2014-01-11 14.51.22

Vienna at Night Panorama

Today hat had a short trip to the Höhenstraße in Wien and had the chance to take this picture.

Vienna at Night from Kahlenberg

Vienna at Night from Kahlenberg

Vienna at Night from Kahlenberg

Vienna at Night from the DC Tower

Vienna at Night from the DC Tower


This picture is taken from the DC Tower in Vienna and where made by stacking four different pictures to reduce noise.

Vienna at Night from Am Himmel

Vienna at Night from Am Himmel

The picture above is taken from Am Himmel. It’s a bit shacked because even the tripod was moving in the Wind at this late December night in Vienna.


Light Pollution

Some people ask me, where to find a good spot to have a great view to the stars. For Austria, this is a good link to follow. There are also a lot of other sites, just search for light pollution. There are also overlays for Google Maps here.

Light Pollution, taken from http://www.nightsky.at/

The second thing to remember is, that you need a clear sky and no clouds. Above 2000 m, the light pollution is at the most places acceptable and the air is thinner and also the lights of the stars brighter.

Third, you need a long dark time span. In winter you will find the perfect conditions. Also to mention: if you hear in the news, that a weather inversion takes place, get your car and find a hill. The air near the surface will be colder than in the highs and all clouds will follow the cold air.

Fourth: As i said before, find the highest place you can get! The air gets thinner, the stars become brighter. So simple, so good.

 UPDATE:

Stephan Paukner from paukner.cc has also found some information and made a nice Google Maps overlay.

Dark Spots in Austria, taken from paukner.cc


need MACRO lens!!!

I’ve decided that i need a macro lens… but i can’t afford one… so i decided i need a Achromatic lens… can’t also afford this. BUT! Today i spoke to a friend and he told me he has a macro extension tube, used but in good condition. Next week i will try some test shots, hopefully the tube is worth 50 €. So, some pictures will come soon, but for this time, here some boring macro shots… 🙂

aloisguentherhaus V2 pictures

At the first day in 2014, I decided not to stay at home and to cure my hangover. The first idea i came up with: what’s about a timelapse with stars? So I loaded my camera and went on the hunt for some food and warm clothes. I had an idea for the Location: the Alois-Günther-Haus. Unfortunately, I was a bit late, so there was a climb to the summit is no longer in question. But, “no problem” I think to myself, i’ve a car! Once at the road to the house I realized the road was unfortunately completely covered in snow and I had no snow chains. After several failed attempts I decided to try the way backwards.

8 Kilometers and three breaks later (the car starts to overheat quickly, because of no cooling from the front), I arrived at a nice spot and started immediately build up my equipment. For the shots, I choose my standard Canon 18-55mm IS II. The 50mm 1.4 Sigma is for sure brigther but at my APS-C (and the resulting ~80mm) the stars will be streaks with a exposure longer than 20s.

After some test shootings i had my settings. I used ISO 1600 and an 25 seconds exposure. I also set the aperture to the highest value, that my lens allows: 3.5 at 18 mm. This is what i got:

Thereafter, I started a timelapse and sat in my car, waiting. Luckily i bought delicious ham and cheese for dinner. 🙂 Maybe I should buy a camping boiler.
After 1 1/2 hour I canceled my adventure, because -8 C and 80 km/h wind are no fun… But i think the result is quite impressive. I will upload this in the TIMELAPSE section later. So I took my stuff, drove to the house, get a coffee and hit the road straight to vienna.